
Are you looking for a step by step guide to install Windows 11 on your PC or laptop? Well, in this article, let’s see how to perform a clean installation of Windows 11 using the ISO file. The articles covers everything right from the beginning to the very end in detail.
With features like the ability to install Android app via Windows Subsystem for Android, visual UI changes, etc. Windows 11 is one of the best releases from Microsoft ever. The ISO file of Windows 11 can be downloaded from Microsoft’s website.
Follow the installation guide given below and install Windows 11 on your PC, all by yourself. So, let’s get started.
Windows 11 Installation Pre-requisites
Before getting into the installation, there are some pre-requisites or requirements to install Windows 11. So, let’s take a look at them real quick.
- Windows ISO file (5.5GB) – Internet connection to download image file
- A USB stick with a minimum capacity of 8GB
- A partition with at least 30GB of space
- Rufus for creating bootable USB
Links to download Rufus can be found below.
Download Windows 11 ISO
As we are performing a clean installation of Windows 11, we need the ISO file for installation. The ISO file of Windows 11 can be freely downloaded by following the guide given below.
You can either download the regular Windows 11 ISO file or even download the Windows 11 Insider Preview ISO.
Here’s the complete tutorial on downloading Windows 11 ISO for clean installation.
Once you have successfully downloaded the ISO file of Windows 11 then follow the steps given below.
How to install Windows 11 on your PC?
If you are new to installing Windows 11 OS on your computer, then the guide given below will walk you through the entire process, from start to the very end.
Step 1: Download Rufus from here and open it up. Once downloaded, open it up.
Plug in the pendrive with a capacity of at least 8GB in size. Open Rufus, and at first, select the USB Stick. Under the Boot selection option, select the newly downloaded ISO file of Windows 11.
Once selected, click on the Start button to start the process. A warning popup might appear, click on the OK button and proceed.
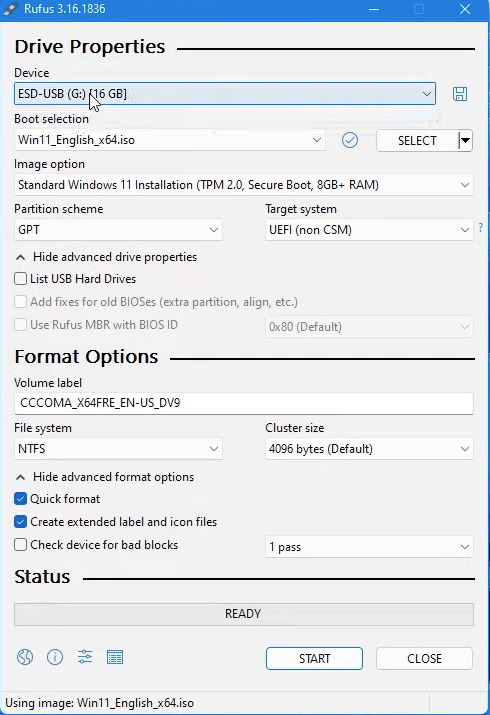
Wait for some time unit Rufus burns the ISO file to the USB stick. The process might take up to 30 minutes.
Step 2: Restart your computer and click on the boot manager key. The boot manager key depends on your motherboard manufacturer. If you are not sure about your PC or laptop’s boot manager key, you may do a simple Google search for “PC/Laptop model name boot key,” and you should find them.
Step 3: Once you enter the boot manager, select the pen drive from the list the hit enter. You can use the arrow up and down key to navigate between options.
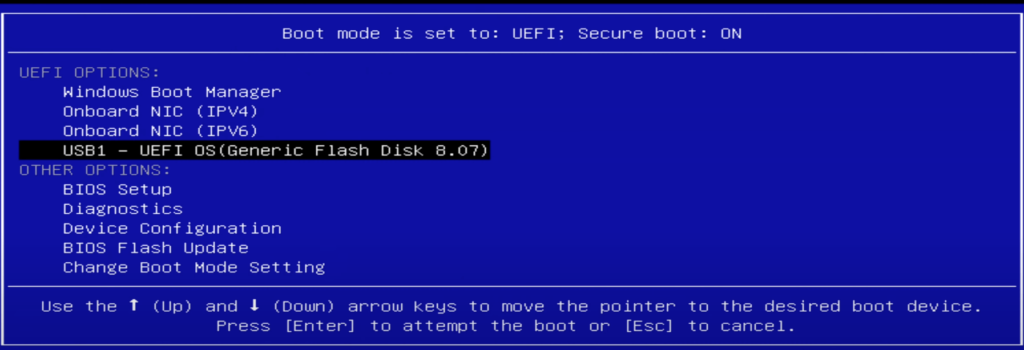
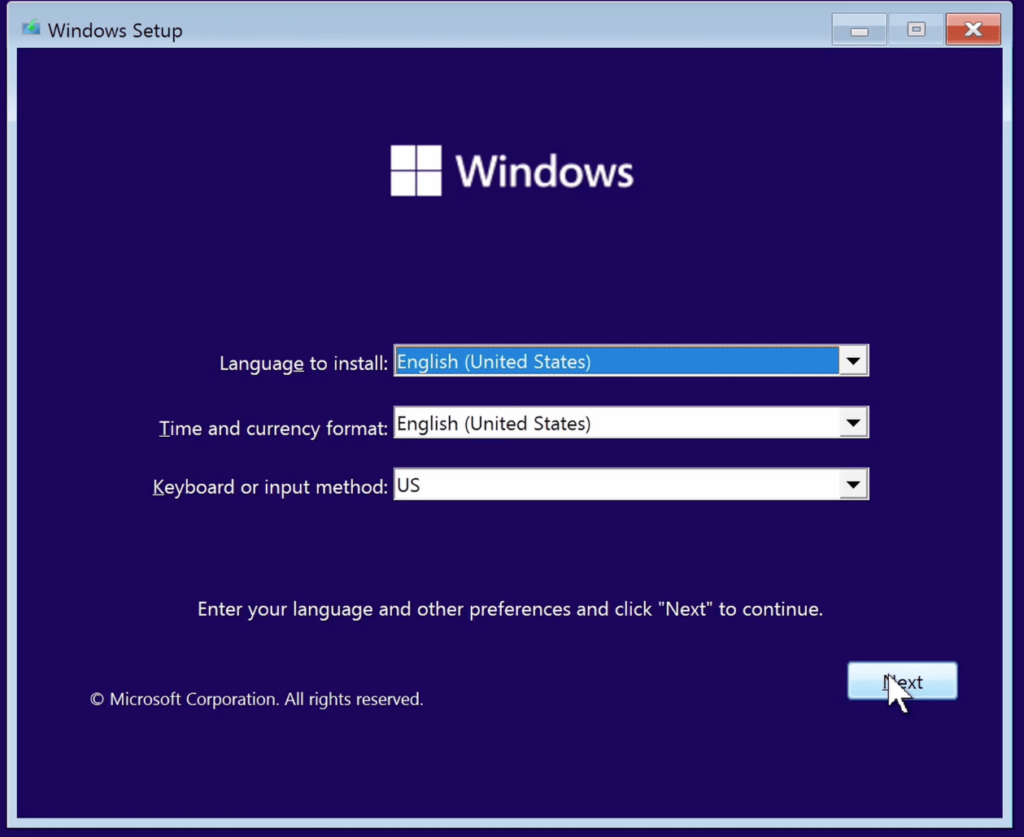
Step 4: Wait for a few seconds, and the Windows 11 setup screen will pop up.
Firstly, select the language, time and currency format, and keyboard layout/input method. Once selected, click on the Next button.
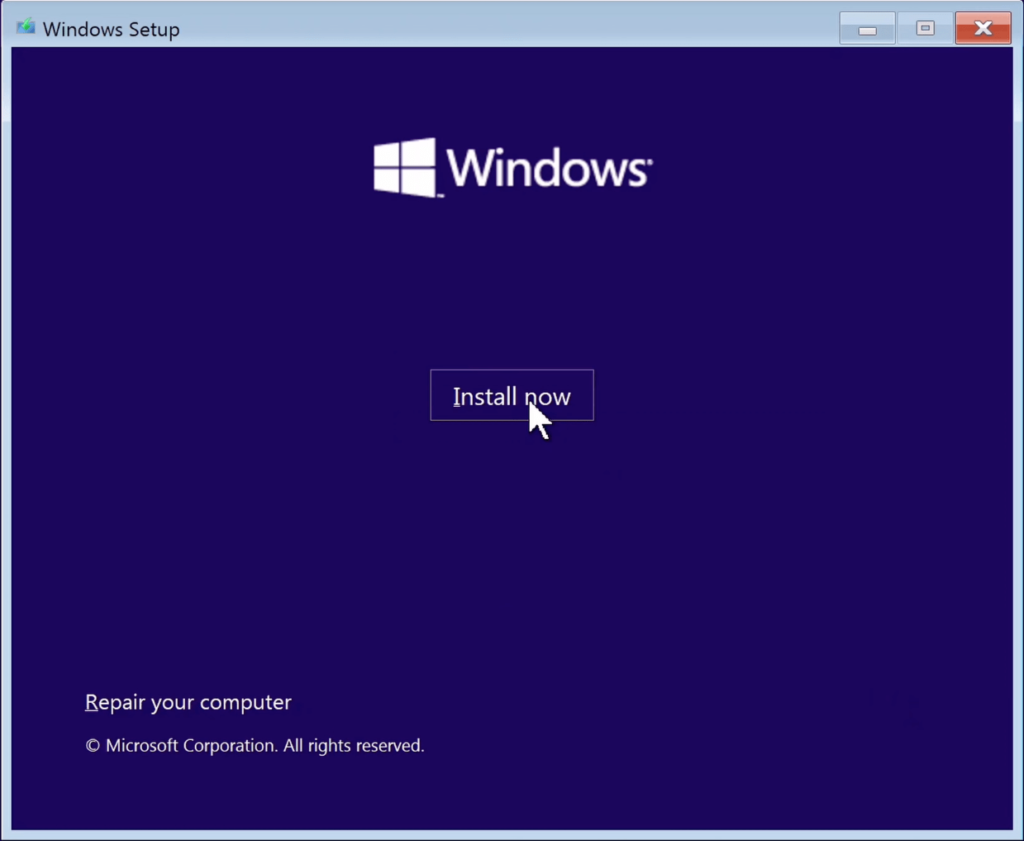
Click on the Install now button.
Under the Activate Windows section, click on the option ‘I don’t have a product key.’ You can activate Windows 11 now and after the installation.
Now, it will ask you to select the version of Windows 11 that you would like to install. You can choose a version of your choice like Windows 11 Home, Win 11 Pro, etc.
Accept the agreement and license by ticking on the checkbox and click Next.
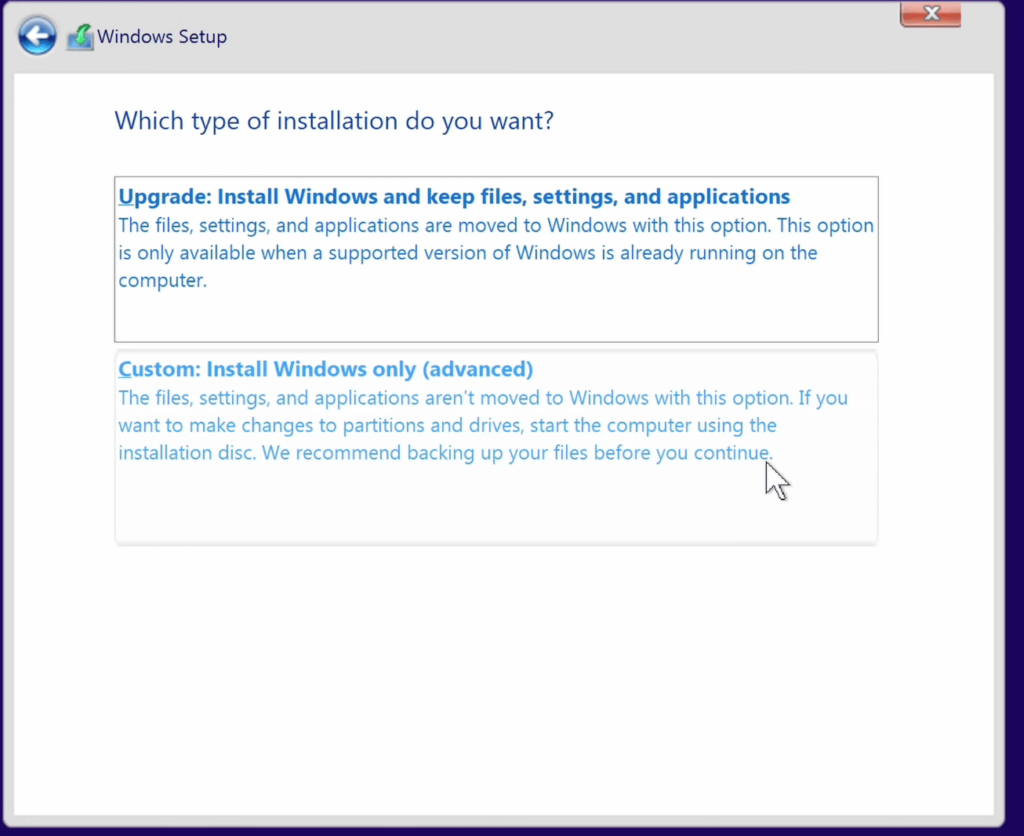
Since we are performing a clean installation, you need to select the Custom: Install Windows only (advanced) option.
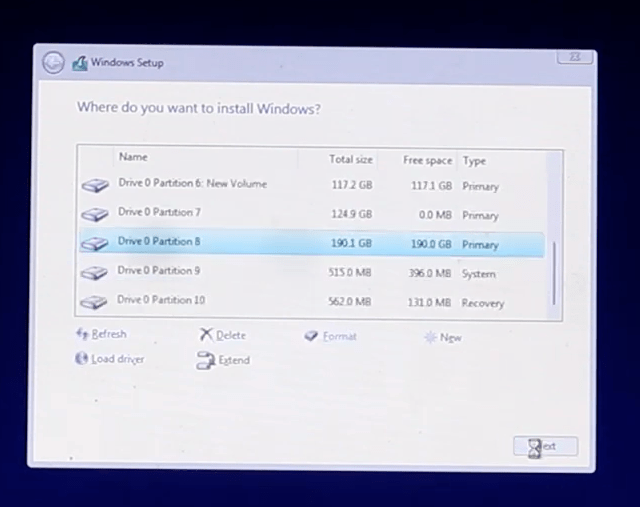
It will now ask you to select the partition to which you need to install Windows 11. Select the partition from the list, format if required, and click on the Next button.
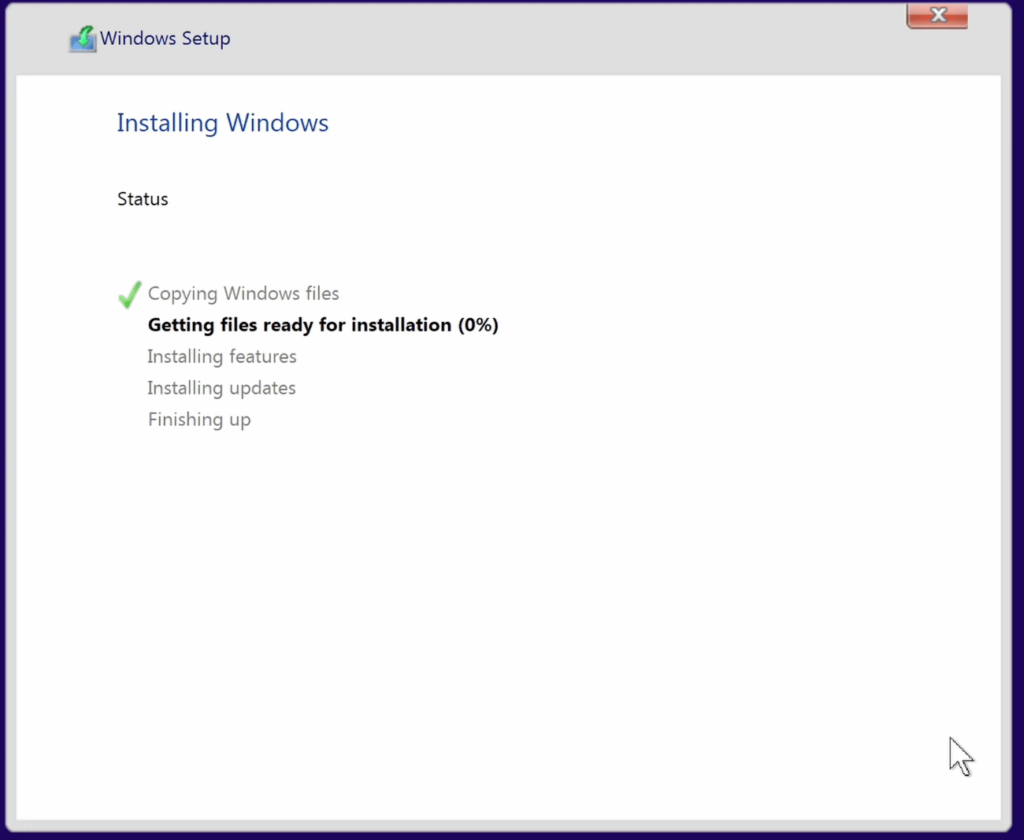
As soon as you click on the Next button, the installation process will start. It might take some time. So wait patiently. And your computer might restart several times during the installation, it is entirely normal, and you are required to do nothing. If an OS selection box appears, let it select automatically. (For example, if you had Windows 10 installed before, then an option to choose Wind 10 and Win 11 will appear.)
Now another setup window will appear asking you to configure basic details like the country/region.
Select the country and keyboard layout.
Now connect to a WiFi network. If not, you can skip this step.
Now you need to complete a bunch of personalization settings and options like naming the PC, setting up the username, password and update settings, etc. You can follow the on-screen instructions to set up Windows 11.
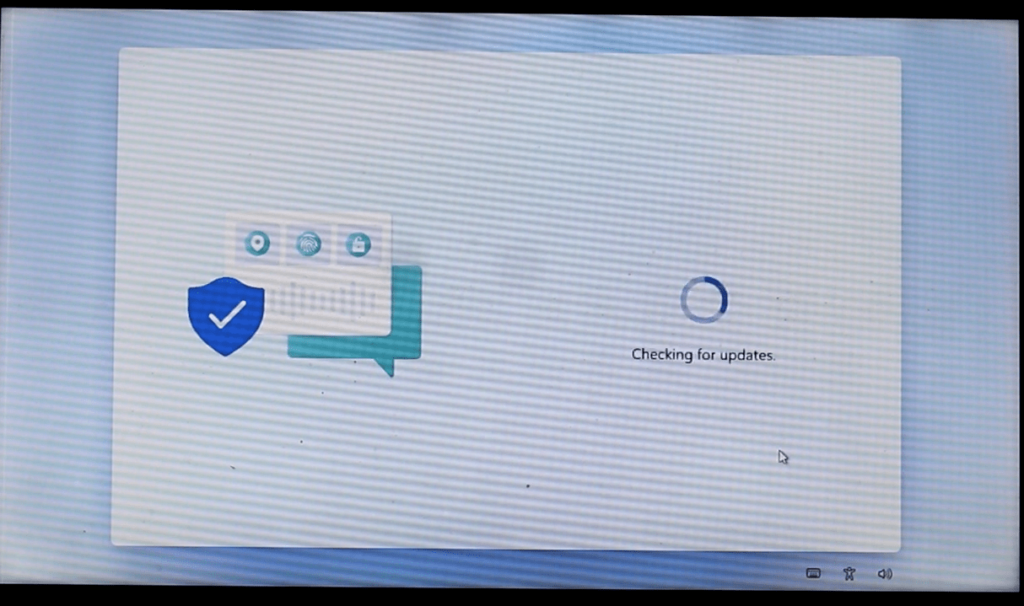
Once the installation is done, you can start copying files and install necessary software as well. If you are on a WiFi network then make sure to enable automatic updates to receive updates as soon as they are out. Or if you are on a limited network then you might want to turn off auto update as it might consume a lot of data.
Windows 11 Clean Installation
This is how we perform a clean Windows 11 installation. First, you need to download the Windows 11 ISO file. Once we get our hands on the ISO, we can burn the same to the USB stick and then install Windows 11 on our PC.
Make sure to backup your essential files on the C drive or the drive in which you have the current OS installation. For example, if you have saved some important files on locations like Desktop, Documents, Downloads, etc., they will be deleted as you format the drive.