
Windows Key on a standard Windows keyboard comes useful as it can be used as a shortcut key to trigger various actions. But at times, the Windows key can become annoying as well. An accidental click on the Windows key might bring some options or trigger something that might interrupt your work.
For example, if you are into gaming then you might know how annoying is it to click the Windows key accidentally. This comes worst if you are playing games like COD, PUBG, etc where each millisecond does matter a lot. So, long story short, Windows key can cause some non-harmful annoyance.

For a normal person, the WIndows key will be useful as it can be used as a shortcut to access settings or options faster. For example, pressing Windows Key + R will bring up the Microsoft Run command window or Windows Key + G to open the game bar, etc.
In this article, we will see how to disable the Windows key on Windows 10 so that you can avoid accidental clicks. I will share multiple methods to turn off the Windows key on Windows 10. You can select one that you feel is easy for you.
How to Disable Windows Key on Windows Keyboard?
The steps are pretty much the same for different versions of Windows including Windows 10, Windows 8, and Windows 7. You have two options, the first one is to disable the Windows key only. Using this method, other shortcuts using another key along with Windows key will continue to work.
And the second one is to disable all actions relating to the Windows key including all the shortcuts like Windows key + R, etc.
So, let’s see how to disable Win Key on Windows easily.
1. Disable Windows Key using Reg File
This is the easiest method for disabling the win key on Windows. If you don’t want to go through the complex procedure of manually editing registry files then this is the method you are looking for.
In this method, we will be using a reg file to enable or disable Windows Key. There will be two Reg files that you need to use. One to turn off the win key and the other one to turn on the win key.
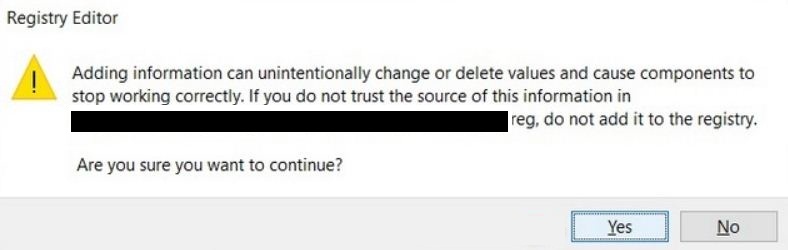
- To disable Windows key using reg file, simply download this file, and once downloaded double click on it to open. A popup box will appear asking you to confirm your action. Just hit the Yes button and it will automatically add the entry to the registry file.
- After it’s done, if you want to enable the Windows key again, simply download this reg file and then open it up. Press the same Yes button and the added registry entry will be removed enabling the Windows key back again.
2. Manually Turn Off Windows Key Using Regedit
In this method, we are going to disable the Windows key manually by editing registry files on our computer. When compared with the first method, it will be a little complex. If you want to do it manually then you can employ this method.
You can either disable the Windows key only or Windows key plus all shortcuts as well.
Step 1: Open Windows search and search for ‘regedit‘ and open Registry Editor
Step 2: Once opened, navigate to the below-given directory. (You can use the directory listing to the left side of the screen to reach the destination)
Computer\HKEY_LOCAL_MACHINE\SYSTEM\CurrentControlSet\Control\Keyboard Layout
Step 3: Once you are in the Keyboard Layout section, right-click anywhere on the empty space of the right pane. Click New and select Binary File. Make sure to name the new file as Scancode Map.
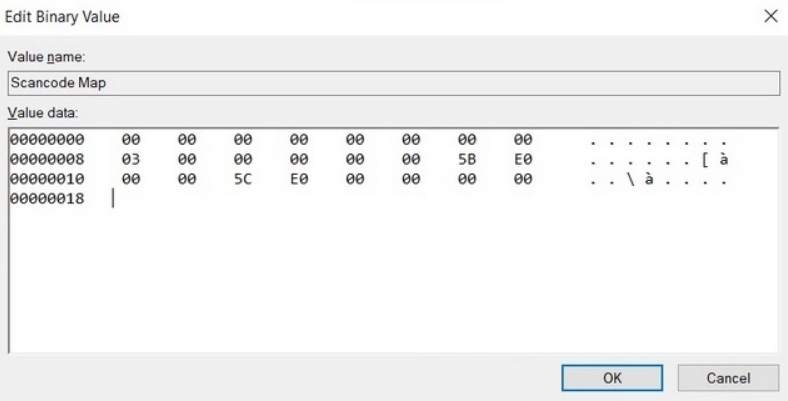
Step 4: Double click on the newly created file and paste the below-given code in the Data value section and hit OK.
00000000000000000300000000005BE000005CE000000000
Step 5: To save the settings and bring them into action, restart your computer. Now the Windows key will be disabled. This means that if you accidentally clicked the Windows key during other works, nothing will be triggered.
But if you want to to disable Windows key and all its associated shortcuts then follow the below given steps.
Step 1: Go to the below given directory
HKEY_CURRENT_USER\Software\Microsoft\Windows\CurrentVersion\Policies\Explorer
Step 2: Right click on the right pane and select New. Now select the option DWORD (32-bit) Value.
Step 3: Name the new file as NoWinKeys. Double click on it and under Value Data, enter 1.

Step 4: Now hit OK and restart your computer to save the changes.
This is how we easily disable or turn off the Windows key on Windows 10. Later after some time, if you change your mind and want to enable the Windows key again, head over to the same directory and delete the newly created file, simple as that.
3. Use built in program to Disable Windows Key
If you are using custom software that came with your keyboard or if you are using a high-end gaming laptop then chances are there will be some special software that gets the job done.
For example, I have the ASUS ROG Strix laptop with me and it comes with a software called Armoury Crate. Using this software, I can control various aspects of my laptop. An option to disable and enable Windows key is present in Armoury Crate. So, all I have to do is just open the software and enable or disable it according to my preference.

Similarly, if you are using some gaming keyboard then there are chances that the keyboard software might have the feature already. If it is present, you can easily disable the Windows key using the software. You can check the keyboard manufactures website for the same.
4. Turn off Windows Key using GPEDIT
In this method, we are going to use Group Policy Editor to disable the Windows key on Windows 10. You can follow the simple step-by-step guide given below to disable the Windows key.
Step 1: Open the Windows Run box by pressing Windows Key + R at the same time. Now enter gpedit.msc and hit enter to open Group Policy Editor.
Step 2: Once the Local Group Policy Editor is opened, navigate and go to the following directory.
User Configuration > Administrative Templates > Windows Components > File Explorer
Step 3: From here, under Settings, find the option called “Turn off Windows Key hotkeys“. Double click on it to edit the option
Step 4: There will be three options in total. We need to set it to Enabled for this to work. Now click on OK to save the settings and exit.
In the future, if you want to enable the Windows key again then just follow the same procedure and select Disabled from the three options there.
5. Disable Windows Key with Sharpkeys
In this method, we are going to use a third-party tool called SharpKeys to disable and turn off the Windows key completely. It is a free utility software that you can download for your computer from here.
I would recommend you download the portable version of Sharpkeys as you are not required to install it in order to use it. It’s just an executable file that you need to download.
First of all, download the Sharpkeys software for Windows 10.
Once opened, select Add button from the bottom left corner of the software.

Now a new pop up will appear with two section. Map this Key and To this Key sections.
Under Map this Key (From Key), click on Type Key. Now, another popup will ask you to hit the button, just click on the Windows key on your keyboard. Once pressed, your selection will be highlighted there. Just click on OK.
Now, under To this Key section, select the first option – Turn Key off and hit OK.
Now press write to registry button to save the change and exit.
This is how we use the SharpKeys utility tool to disable the Windows key on our Windows 10 machine. In the future, if you want to enable the Win key again, all you have to do is just open the software again > highlight the added entry and select the Delete button from the bottom of the software. Now the entry will be deleted from the Registry and Windows key will be back to action.
Why Disable Windows Key?
There might be multiple reasons why anyone wants to disable the windows key. This is mostly used by gamers as there are chances they might accidentally click on the Windows key and bring the Start menu. If you are engaged in an intense gaming session then you might know how annoying it is.
Whatever be the reason, the methods given in the article will help you disable the Windows key instantly. No methods take more than 3 minutes and it is super easy to do as well.
Conclusion
These are some methods that you can use to disable the Windows key or turn off the win key on your Windows 10 computer or laptop. The easiest method is to follow the first method and use the Reg file to instantly disable or enable the Windows key. The second easiest way is to use the built-in program that might be already available on your computer or laptop.
You can follow any method given in the article to disable the Windows key. This will come in handy when you don’t want to interrupt your gaming session by accidentally clicking on the Win key.