
Failed To Play Test Tone is a common error faced by Windows users when the audio software or hardware component fails to work. Most of the time, driver or software misconfiguration is the main reason for the error.
A lot of people face audio driver-related issues on Windows. It looks like these kinds of errors are common in Windows 10 and other versions. A simple driver update or changing the output source device will solve the issue most of the time.
In Windows, we have a lot of solutions to fix this issue. Below, in the article, you will find some solutions that you can try to get the issue fixed. Once the issue is solved, you will no longer see the Failed to play test tone error on Windows.

Why Failed to Play Test Tone Error Appear?
The problem mostly occurs when there is a recent software/driver change. An outdated audio driver can also cause this issue as well. A lot of people get this error when they reinstall Windows or update it to a newer version. After the error appears, the audio will also stop working as well.
Also see how to flush DNS on Windows, macOS and Linux
So, let’s see some fixes to solve the issue.
Fix Failed to Play Test Tone Error on Windows
Here are some workarounds to easily fix Failed to Play Test Tone error on Windows 10.
1. Troubleshoot Playing Audio
If you are not quite sure about the reason why you are getting the Failed to Play Test Tone error, the best thing and the first thing that you should do is run the troubleshooter. Windows comes with a built-in troubleshooter that will help you find the issue.
After finding the reason why the issue occurs, the troubleshooter will also mention some tips to solve the issue as well. So let’s see how to use the troubleshooter to fix the issue.
Step 1: Open Settings by searching for it on the Search or press Windows Key + I to instantly open the Setting app in Windows 10.
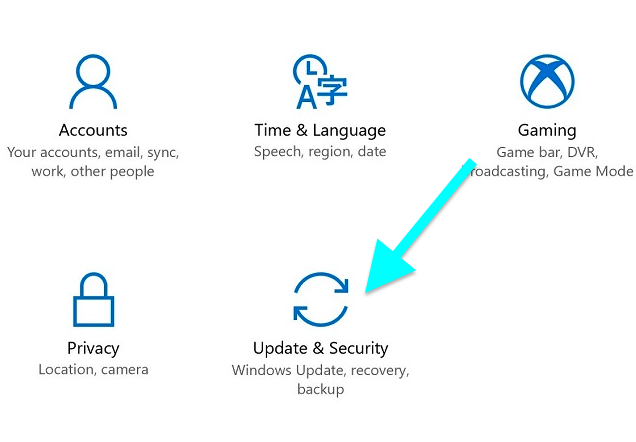
Step 2: From here, click on the option – Update & Security.
Step 3: From the options available on the left hand side of the screen, click on Troubleshoot.
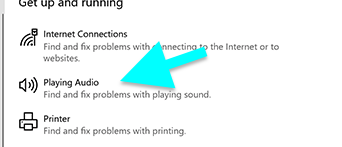
Step 4: Under Playing Audio, click on the Run the troubleshooter button to run it.
Now it will start analyzing all the issues related to playing audio on Windows.
Once found, the troubleshooter will list the reason why the computer fails to play the audio and solutions to fix it as well.
If the issue is with some sort of settings misconfiguration, then you can easily solve it as well.
2. Restart Windows Audio Service
In this method, we are simply restarting the audio service in Windows. This can be easily done by visiting the Services section.
Follow the steps given below to restart audio services in Windows:
- Press Windows Key + R to launch Run or search for Run in the Start menu
- Type services.msc and hit enter to open Services section of Windows. Here, you will find all the services being run on Windows with a bunch of options as well. You can end or restart any service from here
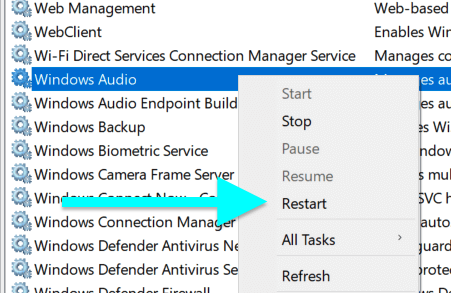
- From the list of services, find Windows Audio and right-click on it. Click on the Restart button.
- Now restart your computer and see if the issue is solved or not.
3. Update the Audio Driver
Outdated audio drivers might lead to issues like Failed to Play Test Tone. So, we can try updating the audio driver to fix the issue.
- Open Search and type Device Manager and open it up
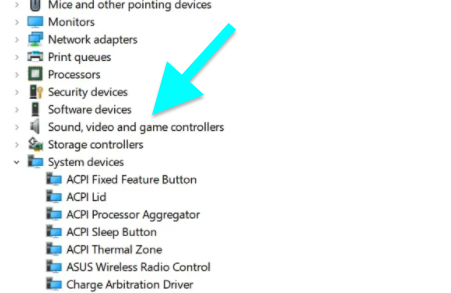
- Expand the Sound, video, and game controllers option
- Right-click on the audio driver and select Update Driver Software…
- You have two options to update – the first one is to download the update online automatically and the second one is to manually install the update via a local file on your computer. If you are about to go with the second option then make sure that you have downloaded the driver package from your motherboard manufacturer’s website.
- Wait for some time until it completes the Audio Driver updates.
- Once done, restart the computer for the changes to take place.
4. Change Sound Format
Windows comes with the option to change the default sound format. Let’s try changing the default sound format to fix the issue.
Step 1: Right-click on the volume icon from the right left side of the taskbar and select Playback devices.
Step 2: You will find all the available playback devices here, make sure to select the default option as the one that you are using.
Step 3: Now select the default playback device and click on Properties.
Step 4: Move to the Advanced tab and there you will find the option called Default Format. Click on the drop-down menu to select a different format. After selecting a different default format click on apply and OK buttons to save the changes.

This is how we change the default format in order to fix failed to play test tone error.
5. Disable Audio Enhancements
A lot of people face the failed to play test sound error while some enhancements are active. So you may try disabling any audio enhancements and see if it fixes the problem.
- Head over to the Speaker Settings and click on Properties.
- Switch to the Enhancement tab and check the option called Disable all enhancements. Once disabled click on the Apply and OK button to save changes.
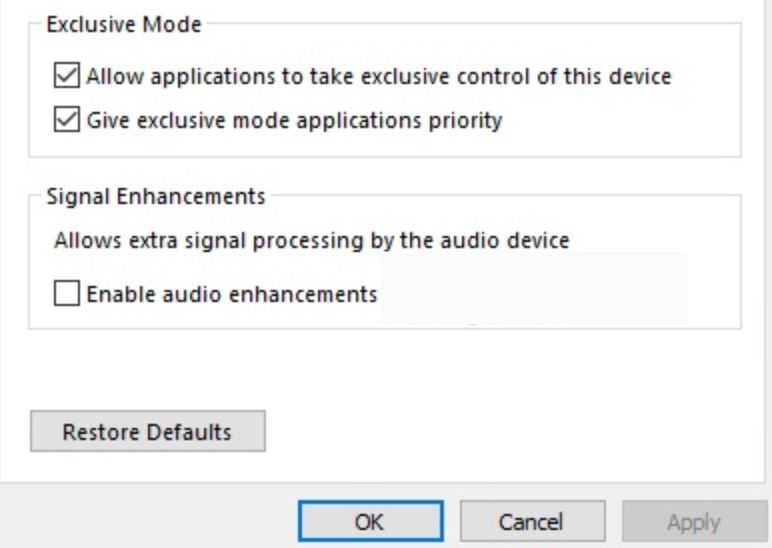
6. Disable Exclusive Mode
Let’s try turning off the Exclusive Mode to fix the issue.
- Once again open Speaker properties and move to the advanced tab.
- On the advanced tab, you will find an option called Exclusive mode. Make sure to check the option-allow applications to take exclusive control of this device.
- Now click on Apply and OK
We have disabled Exclusive Mode in Windows.
7. Try using a different device
To find if the issue is with the speakers, you may try connecting a different speaker and see if the audio is working fine. If the audio playback starts then the issue is with the speaker that you used earlier or some sort of software misconfiguration specific to the speaker is the reason.
If the sound does not work on the new device, then the issue has to be with the computer itself. It can be either a software-based issue or some sort of hardware issue.
8. Switch Default Drivers
Follow this method to install the audio driver that you are currently using and install the original audio driver once again.
- Open Search and type Device Manager
- Once the Device Manager has opened, find the audio driver from the list
- Now right click on the audio driver and click on Uninstall. Confirm your action on the pop-up that appears.
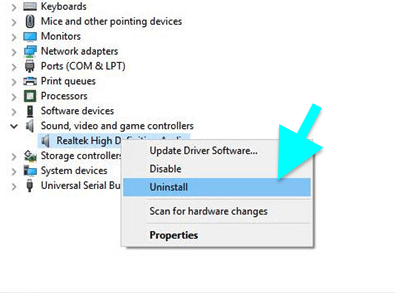
- Once the old driver is uninstalled, click on the Search new hardware option to install the original audio driver for your device.
You may also take a rolling screenshot of the error and send it to your system administrator as well.
Final Words
Failed to play test tone error on Windows can be frustrating for most of the users. As a result, the audio might not work which makes things even harder. Above given are a few steps that you can try to solve or fix the issue. Since we are not sure about the underlying reason why the error occurred in the first place, it becomes hard for us to fix the issue. Try to follow all the steps mentioned above one by one to fix the error and get the audio working again.
Most of the methods mentioned in the article apply to all versions of Windows including Windows 10, Windows 11, Windows 7/8, etc.