
Snipping Tool is a useful utility tool in Windows 11 and Windows 10 that helps us to take screenshots easily. We are not required to use any other additional software to take simple screenshots in Windows.
But some people face issues with the Snipping tool which makes it not work. This article is for you if the Snipping tool is not working for you. I will mention seven different methods that you can try to fix the Snipping tool error on windows.
Try the same methods for all versions of Windows to fix the issue easily. So, without wasting any more time, let’s get into the tips to fix Snipping Tool in Windows.

Fix Snipping Tool Not Working Issue in Windows
Try the below given tips/methods to fix Snipping Tool not working issue in Windows. Follow the same methods for Windows 11/10/8/7.
1. Restart Snipping Tool
The very first thing you want to try is to restart Snipping Tool. Force quitting and opening it again might help us solve the issue.
All you want to do is just open Windows Task Manager and find Snipping Tool from the list of running apps.
Just click on Snipping Tools and click on End Task button from the bottom section of Task Manager.
Once closed, wait for a few seconds and then try to open Snipping Tool again.
2. Allow Snipping Tool To Run In The Background
Snipping Tool may fail to run as expected if is does not have required permission to run in the background. So, we have to make sure Snipping Tool got all necessary permissions.
If the permissions are not granted already, let’s go to the App Settings and enable them.
Open Start menu and click on the Settings icon (You may also press Win Key + I shortcut to quickly launch Windows Settings as well)
From the options on the left side, click on Apps and then on Apps & Features
Scroll through the list of installed apps and find Snipping Tool. You may also search for Snipping Tool.
Once found, see if Background apps permission is enabled or disabled.
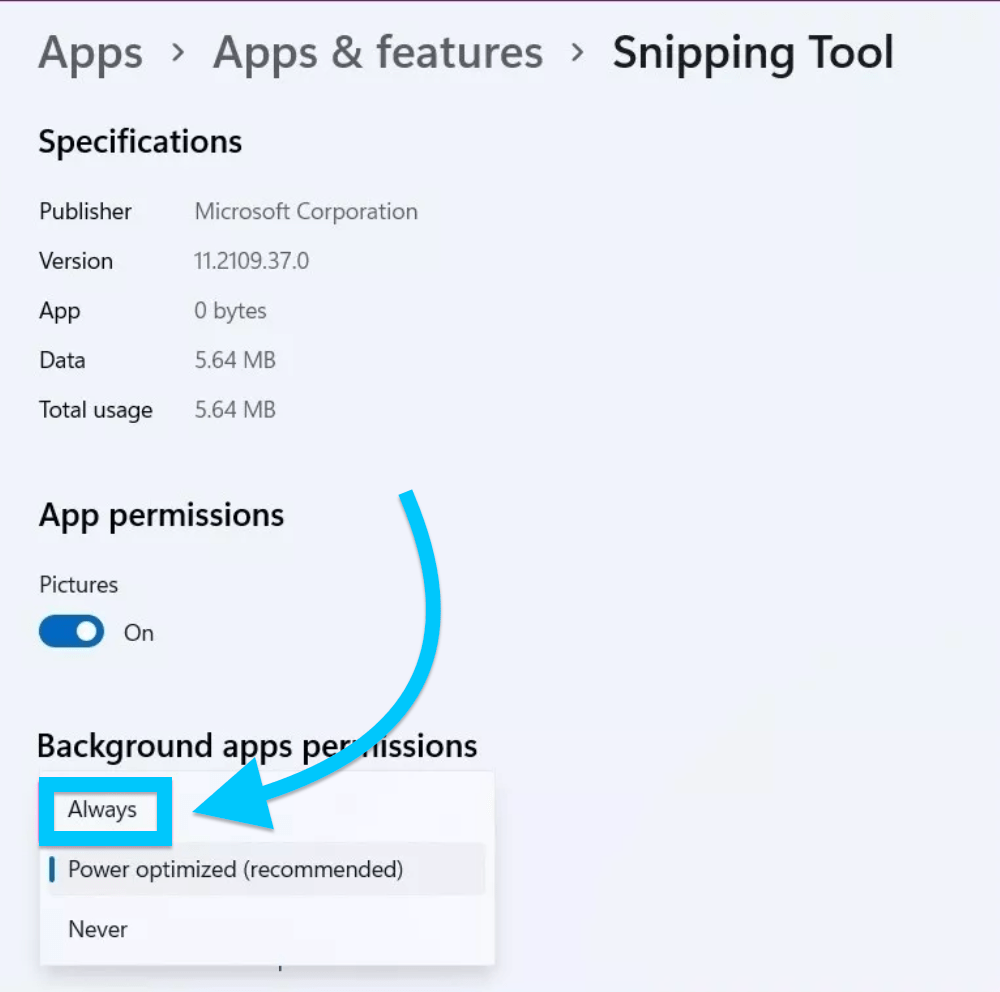
All you have to do is switch it to ‘Always’.
Close Settings and try to open Snipping Tool
3. Update Windows
Due to expired Digital Certificate issue, a lot of Windows apps including Snipping Tool was not working on Windows 11. Soon after Microsoft realizing the issue, they pushed a new update KB5008295 to fix the same.
Chances are, you might be still running the old version of Windows. To fix the issue, all you have to do is just head over to Settings and see if there is any pending update to be done. A lot of people turn off automatic Windows Update, so, there’s a good chance a update might be pending.
Open the Start menu and click on Settings icon
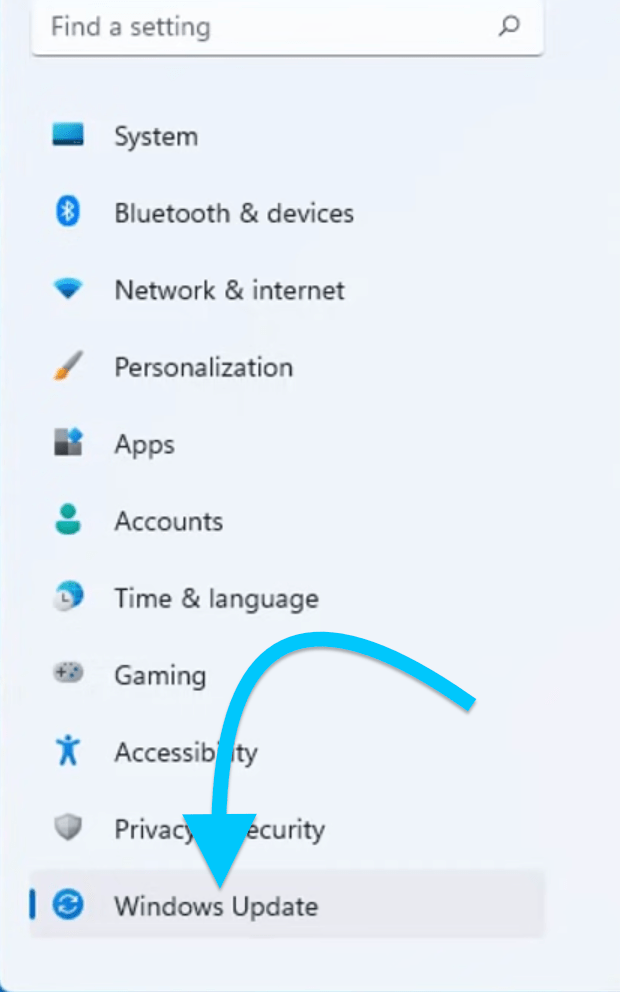
Select Windows Update from the options on the right side.
Click on Check for Update button to see if there’s any new update to be done.
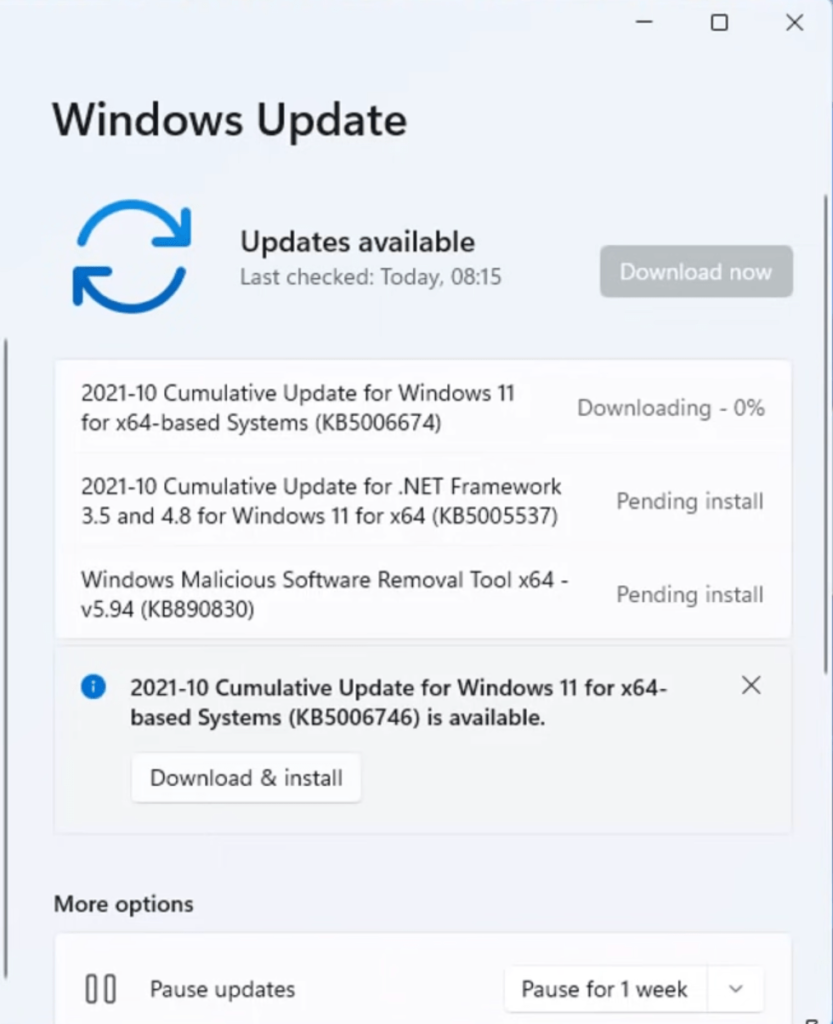
If any new update is available, then do the update and this should hopefully fix Snipping Tool.
4. Repair Snipping Tool App
Did you know that there’s an option to repair or reset apps in Windows 11. Similar to Android, Windows too, now have an option that will let us to reset or repair installed apps.
Let’s try using the built-in repair option to fix Snipping Tool.
Open Start menu and search for Snipping Tool.
Right click on the Snipping Tool and click App Settings.
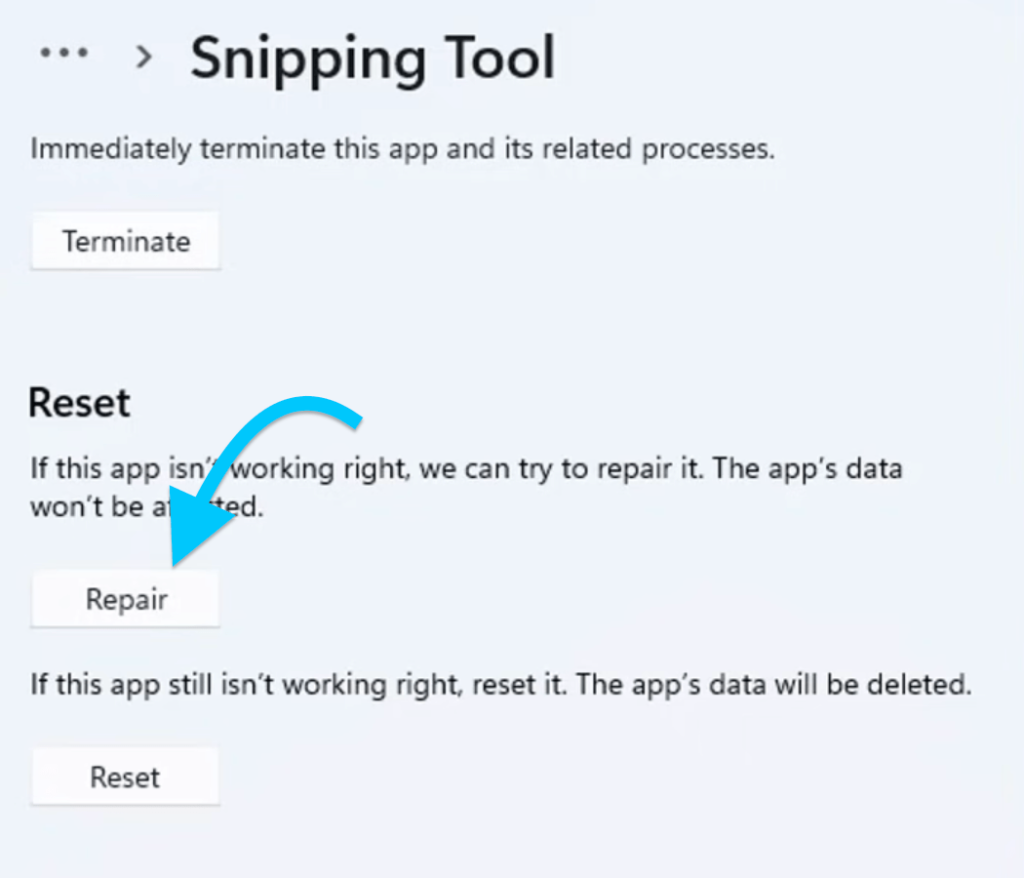
Now click on Repair option under Reset section.
After repairing Snipping Tool, try opening it and see if the issue is solved or not.
If not, return to App Settings page of Snipping Tool and click on the Reset button.
This will reset all Snipping tool app related data.
This might help you in solving issues related to Snipping Tool.
5. Run System File Checker Scan With PowerShell
The underlying reason why Snipping Tool is not working might be because of corrupted or damaged system files. In Windows, we have an option to scan for any errors related to system files.
Doing a simple SFC (System File Checker) Scan will let us know if there’s any issue.
To perform an SFC scan on your PC, follow the steps given below.
- Open Start menu and search for Windows Terminal, and open it up. (Select as admin)
- Once opened, use the below given code to run a SFC scan
SFC /scannow- The scanning process will take some time. Wait till it is done.
- Once done, restart your PC and once turned on, try launching Snipping Tool.
6. Try Windows App Troubleshooter
In Windows 11, there is a tool called App Troubleshooter that will help us to find and fix errors.
Open Windows Start menu and click on Settings.
Under System, click on Troubleshoot.
Now, select Other troubleshooters.
Under Other troubleshooters, click on Windows Store Apps.
Let the process complete and it might help you in fixing Snipping Tool error on Windows.
7. Use Keyboard Shortcut
Instead of directly opening the app via Start Menu. or desktop shortcut, try using the keyboard shortcut and it might work.
The keyboard shortcut to open Snipping Tool in Windows is Windows Key + Shift + S.
Now see if this opens Snipping tool without an error or not.
Snipping Tool Not Working Issue Solved
These are some of the easiest ways to fix Snipping Tool not working issue in Windows. A lot of people are facing issues with the Snipping Tool lately. If you are too facing issues with Snipping Tool then make sure to try the methods given below to fix it easily.