
If you use WiFi to access the Internet on your Windows computer or laptop, then there are chances that you might encounter with “WiFi doesn’t have a valid IP configuration” error. Recently, I changed my modem, and soon after configuring the modem properly, it started showing an error like WiFi doesn’t have a valid IP configuration. I was not able to connect to the Internet to fix the issue. But the interesting thing was that I was able to use the Internet from the same WiFi network on my smartphone but not on the laptop. So, I knew something was wrong with the configuration of the laptop and not a network issue altogether.

I tried running Network Troubleshooter and it threw the same error. The troubleshooter tried to fix the error on its own, but it couldn’t. If you encounter such an error then you need to manually fix the issue. WiFi doesn’t have a valid IP configuration is relatively common and can be easily fixed in a minute or two. There are multiple methods that you can follow to fix the issue. Go through them fix WiFi doesn’t have a valid IP configuration issue on Windows 10. Recently, we have also shared some methods to fix WiFi Connected but no Internet issue as well.
Reset TCP/IP
This is the method that I used when I saw the error and to my surprise, it worked fine. All you have to do is just enter two commands on CMD and then after applying it, simply restart your computer. The error will be resolved and you can start accessing the Internet again.
Step 1: Click on Windows search and search for CMD
Step 2: Right click on CMD and select ‘Run as Administrator’
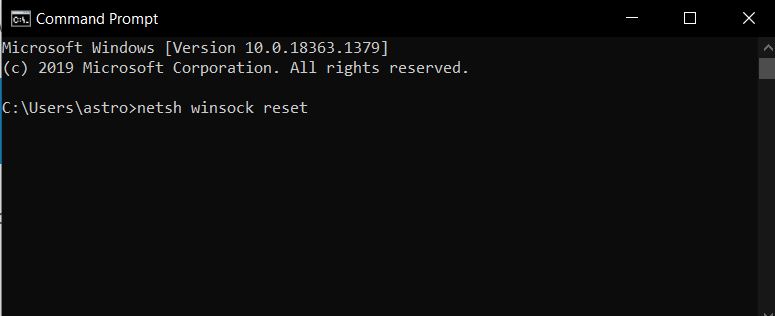
Step 3: First of all, run the below given command:
netsh winsock reset
Step 4: After running the first command, now type the second command given below and hit enter.
netsh int ip reset
Step 5: Now restart your computer to gain access to the Internet again. The WiFi issue will be solved and you can continue browsing the Internet.
Read also: Create WiFi Hotspot in Windows
Release And Renew IP Address
We are going to use CMD in this method as well. In this method, we are going to use a couple of commands to get the error sorted. The steps are pretty much similar to the first one, only command changes here.
Step 1: Click on Windows search and search for CMD
Step 2: Right click on CMD and select ‘Run as Administrator’
Step 3: Run the command:
ipconfig /release
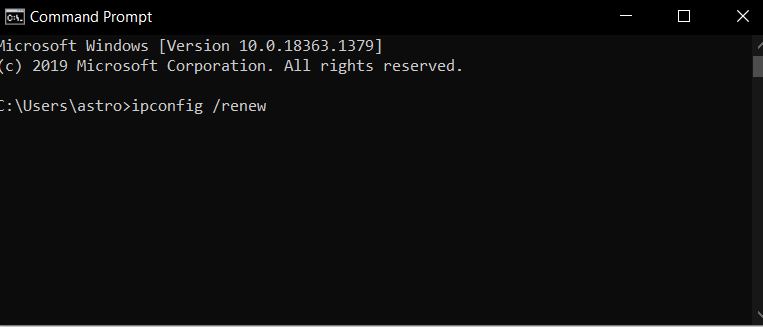
Step 3: After running the first command, now run the below given one:
ipconfig /renew
Step 3: Finally, type exit to exit from CMD and now restart your computer. Running these two commands should fix the issue. Now you will have Internet access.
If you are not able to get Internet access even after running two sets of these commands, then there are some workarounds as well.
Set IP Address Manually
In this method, we are going to set up and configure the IP address manually. By default, we will be using the the option to automatically set IP address, but in this method we will try setting it manually to see if the problem solves.
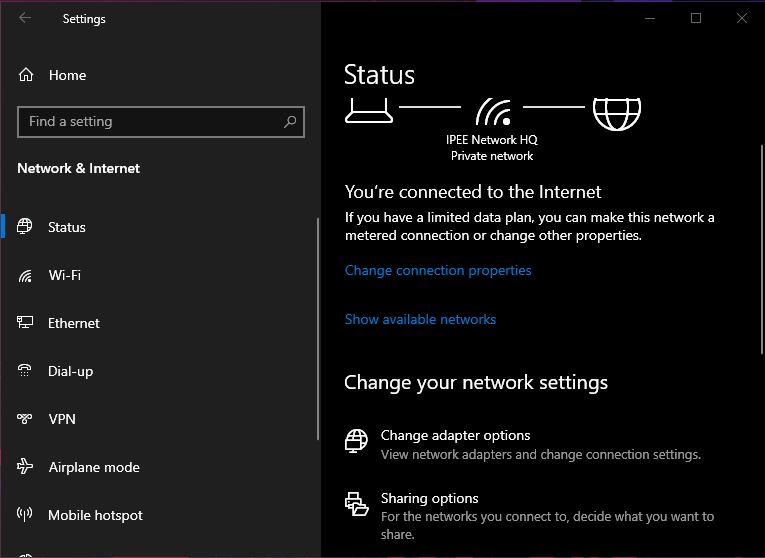
Step 1: Right click on network icon from the Taskbar and Open Network and Sharing Settings
Step 2: Click on “Change adapter options” from Change your network settings tab
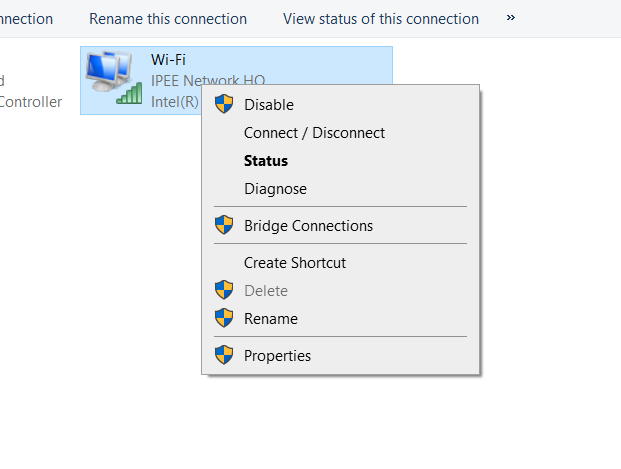
Step 3: Select the WiFi Network that you are using – right click on it and select properties
Step 4: Double click on “Internet Protocol Version 4 (TCP/IPv4)”
Step 5: Under the general tab, tick on the second option called “Use the following IP Address”
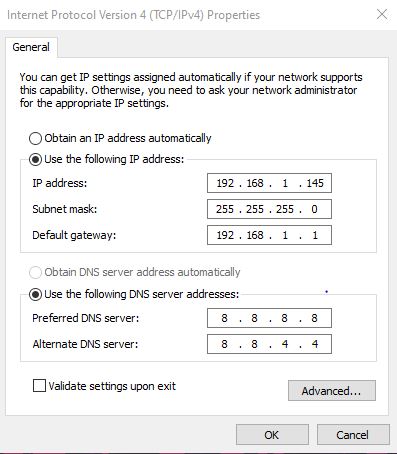
Step 6: Now enter the below given IP address in the first section and DNS values in the second section
IP Address: 192.168.1.3
Subnet mask: 255.255.255.0
Default Gateway: 192.168.1.1
Preferred DNS Server: 8.8.8.8
Alternate DNS Server: 8.8.4.4
Step 7: Now save the changes and exit to see if the Internet has restored or not.
Fix Incorrect IP Configuration
If you played with your WiFi connection’s IP Address then there are chances you might have incorrectly configured things. To fix it, simply head over to the same page as above and use the automatic option to obtain an IP address.
Step 1: Right click on network icon from the Taskbar and Open Network and Sharing Settings
Step 2: Click on “Change adapter options” from Change your network settings tab
Step 3: Select the WiFi Network that you are using – right click on it and select properties
Step 4: Double click on “Internet Protocol Version 4 (TCP/IPv4)”
Step 5: For both the section. select the first options – “Obtain an IP address automatically” and “Obtain DNS Server address automatically”
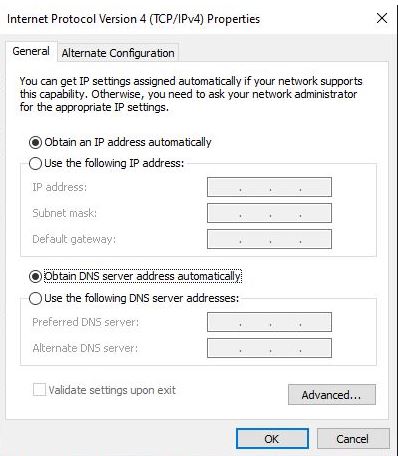
Step 6: Save changes and exit
These are some work arounds that you can try to fix the issue.
Finally, after everything is done, you can use any WiFi Analyzer software to make sure that WiFi is working fine and you are getting the full bandwidth as well.
WiFi doesn’t have a valid IP configuration Solved
In my case, I fixed the error soon after trying the first method itself. If the first one doesn’t get it right for you, then the second one should help you in fixing the error. These are the two steps that you should try in the first place. If both of them fail then make sure to try other methods and see if they are working. WiFi doesn’t have a valid IP configuration is not much of a big issue. This error simply means that there is some sort of misconfiguration that is not letting you access the Internet. Even if the error persists on your laptop, the Internet might be accessible on your other devices without any problem.