
Everyone was quite thrilled when Microsoft announced that Linux Terminal would be added to windows. This happened due to the partnership between Microsoft and Canonical and it decided that it would be named Bash on Windows. Though it was announced it was not available for Windows users and they didn’t know how to install and use the Linux terminal in windows!

In order to use Bash on windows, people had to install the technical version of Windows 10. But all of this changed with the arrival of the Windows 10-anniversary upgrade. And you can quite easily install Bash on Windows by following the methods that have been provided below.
How To Install and Use Linux Terminal in Windows
It’s very important to understand Bash before installing Bash in windows. So, what is Bash on windows?
Originally, Bash is bash shell that can be found on Linux. With the partnership between Windows and Linux, Bash on windows was made which formed a complete Linux system inside windows. This used windows as a subsystem and Linux runs on it and it was possible to install this on windows just like a regular application.
There are basically two ways to install WSL and here is how to install and use the Linux terminal in windows.
Note: WSL stands for Windows Subsystem for Linux.
Method 1
Running WSL on windows 11 is rather simple and that can be done with a few clicks. And you will need to utilize a command-line window with Administrator privileges to accomplish this. We’ll use the Windows Terminal for this, but you may alternatively use Command Prompt.
You can learn about How to Enable SSH in Kali Linux here.
Step 1:
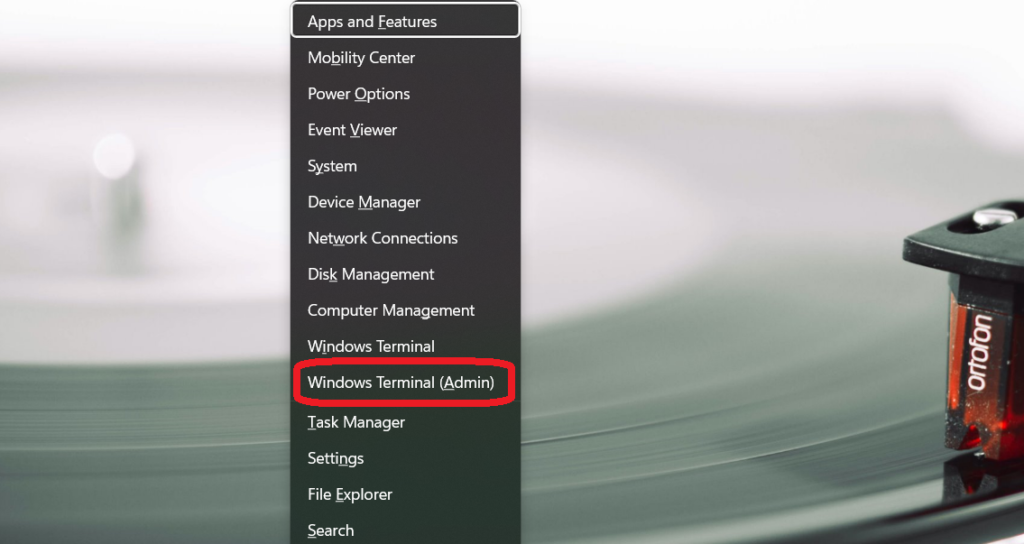
Open the start menu and search for Terminal and then right-click on the app and run it as an Admin. You can also press the Windows and X button together, this will open a menu can you can choose Windows Terminal (Admin) from that menu.
Step 2:
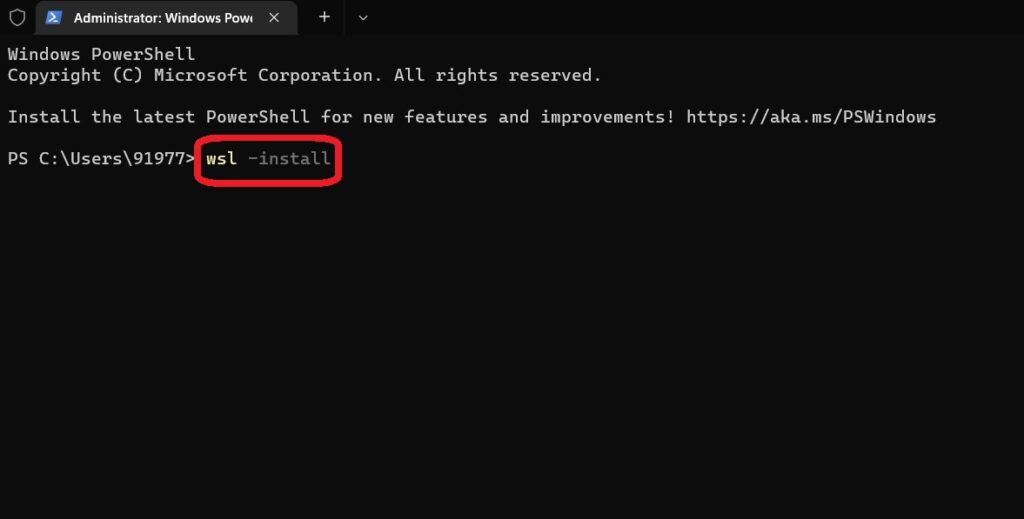
Run the command wsl –install as it is the default distribution.
This command will enable the WSL and install Ubuntu. The process might take some time, please wait patiently.
Step 3:
After the completion of the process, your system will ask for a Reboot. Do allow it. You will be able to use Linux after you do that.
The Reboot part is very necessary as without it you want to be able to use the Windows subsystem for Linux.
If you want you can also run other distributions such as
- wsl -l -o
- wsl –install -d Name (example: wsl –install -d Debian).
The second command will let you install a Linux distribution of your choice and you can replace the “Name” of the command with a distribution of your own choice. We a choose Debian. You can install several Linux distributions by running these commands multiple times.
Step 4:
After the reboot, you can just click on the start menu and search Ubuntu. Click on it and you will be able to start using it.
And that’s it. This is the first method that can be used to install and use the Linux terminal on windows 11. Now, comes the second method.
If you want partition managers, here are the 5 Best Free Partition Managers for Linux.
Method 2:
The method is quite slow and complicated in comparison to the first method. And here is how you use this method.
Step 1:
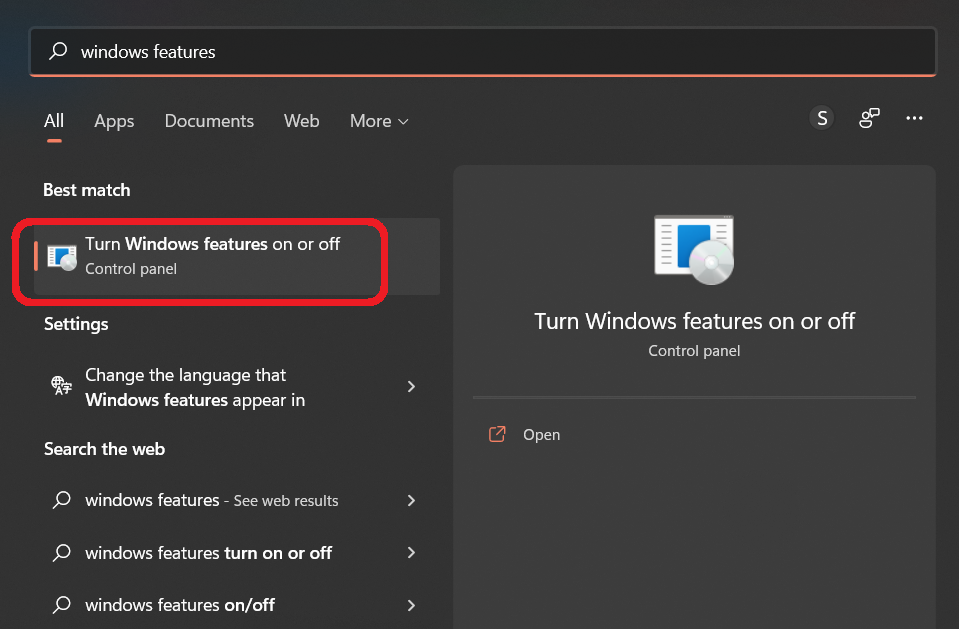
Go to the start menu and search for “Windows Features.” Click on the result to launch it.
Step 2:
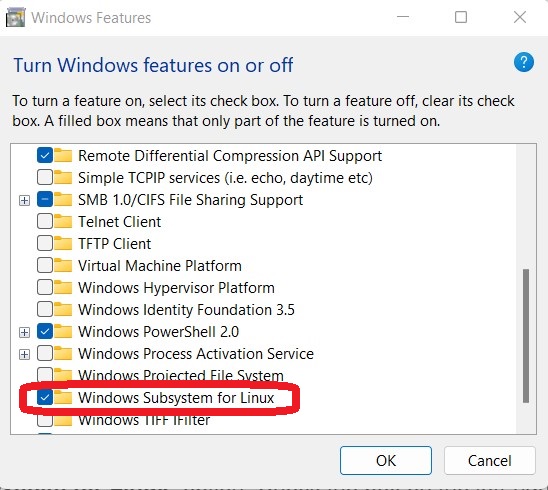
Scroll down to find the “Windows Subsystem for Linux” option. Check the box on the left-hand side and click on OK. The system will ask for a reboot, do allow it.
Step 3:
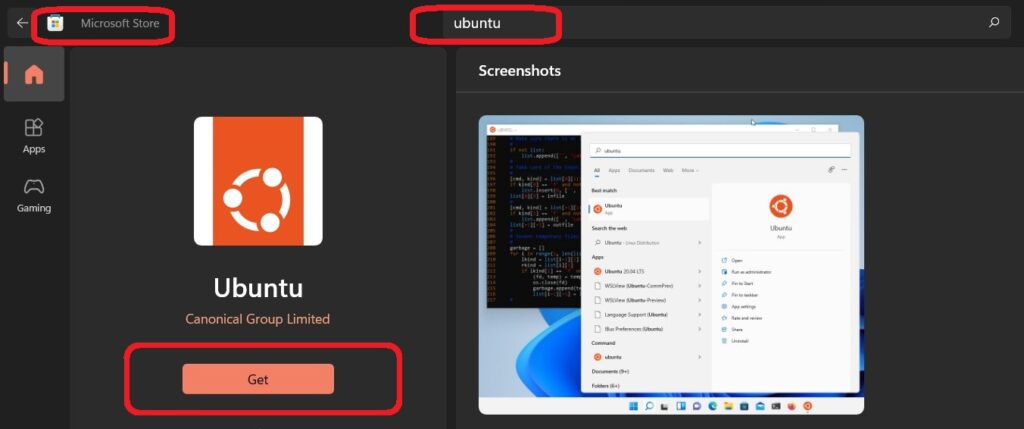
Go to the Microsoft Store and search for Ubuntu or the distribution of your choice and install it.
Step 4:
The installation part is very simple as all you have to do is click on Get, just like any other application on the Microsoft Store.
Step 5:
After the installation is complete go to the start menu and search for the application. Click on it and you will be able to start using it.
And that’s the second method. Though it might sound easy the first method is better and we recommend you to use the first method.
Now, that was all about WSL 1 but WSL 2 was quite recently introduced, and it’s far quite an upgrade from the first one. So, what is WSL 2?
To know more about the steps to flush DNS, read How to Flush DNS Cache in Windows 10/11, macOS & Linux.
What is WSL 2?
The Windows subsystem for Linux also known as WSL is an upgraded version of WSL1. This new version allows the ELF64 Linux binaries to run on Windows. Its primary purpose is to improve file system speed and to add a similar full system call.
The design of WSL 2 is different from WSL 1 and the Linux binaries communicate with your OS and systems hardware in a different manner. But despite everything thing being different from WSL 1 the experience is quite the same.
You can also run individual distributions on both WSL 2 and 1 and both of them can run simultaneously as well. You can even upgrade and downgrade them according to your wish.
Conclusion
WSL made everything easy and users can access Ubuntu apps without any hassle. As mentioned, before you always have the choice of changing distributions without the need to re-installing everything. We hope this would be of help to you.