Closed Captions or live captions is a feature available in Windows 11 that will display the spoken parts of audio as subtitles towards the bottom section of the screen. This feature will be super useful for people who have difficulties in hearing or if you are in a place where you can’t turn on the volume of your computer.
Whatever be the case, Windows 11 got you covered. In this article, let’s see how to turn on closed captions on Windows 11. The steps are pretty much easy and straightforward.

So let’s take a look at the steps to enable closed captions on windows.
How to Enable Closed Captions on Windows 11
Closed captions can be enabled on Windows 11 while playing a video that supports closed captions. Once enabled, Windows 11 will display text similar to subtitles towards the bottom section of the screen.
Apart from enabling closed captions on Windows, you also have some options to customize it as well. For example, you can change the text color, background color, size, etc.
So, here is how to enable closed captions on Windows 11.
Just play a video. Now, once the playback has started, right-click or tap and hold anywhere on the video. A new menu bar will appear with the closed captions options, you will find a CC icon next to it.
Just click on the CC icon to enable or disable closed captions on Windows 11. You also have the option to select the language.
You may also use the keyboard shortcut Windows Key + Ctrl + L as well.
This is how we enable closed captions on Windows 11. You can enable live captions on any supported video.
How to Customize Closed Captions Appearance?
Now that you know how to enable or disable closed captions on Windows 11, next, let’s see how to customize the closed captions to change the font style, background color, text color, etc
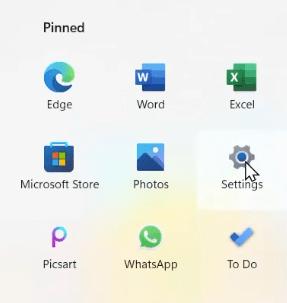
Click on the start menu from the taskbar and click on the Settings button to open window settings.
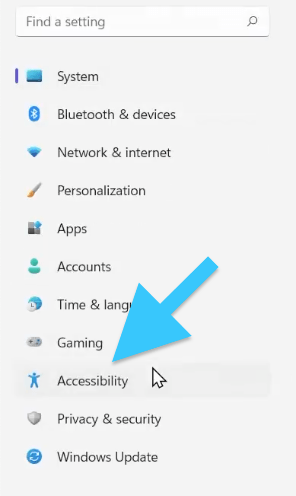
From the options available on the left side, click on Accessibility.
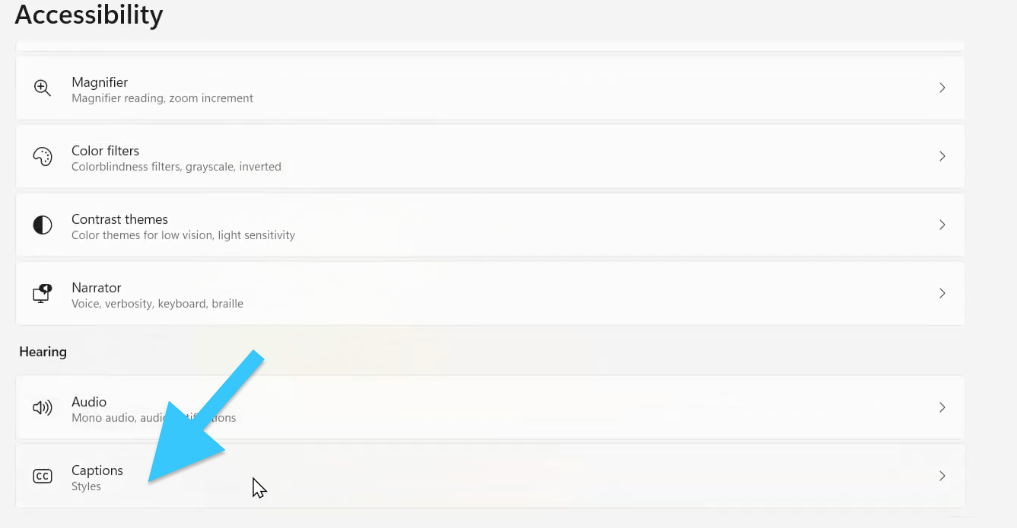
On Accessibility settings, you will find the Captions Styles option under Hearing settings. Just click on it.
Firstly, you need to select a caption style to use. White on black is selected by default. You have the option to change it to the below-given options:
- Small Caps
- Large Text
- Yellow on Blue
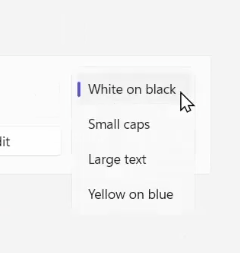
The above given are some basic styles to choose from. If you are not happy with the results, you also have the option to edit the styles as well.
Click on the edit button under caption style.
Here, you will find the option to edit the Text color and its opacity, size, font, effects, Background and Window style.
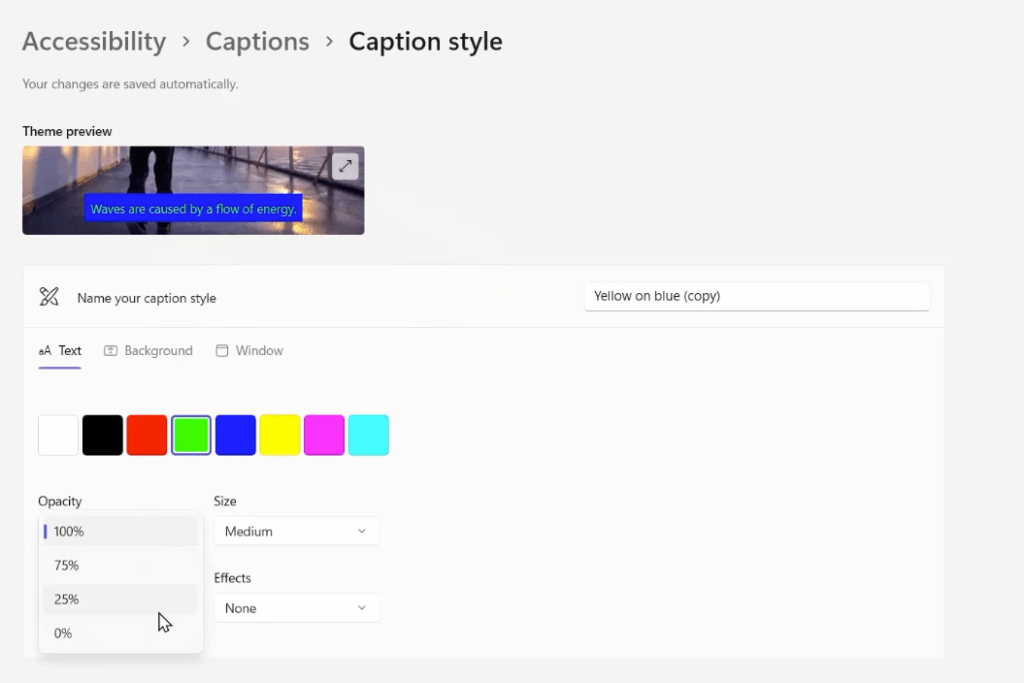
Once you’re happy with the results, hit the save button and you’re all good to go.
Next time onwards, when you enable closed captions on Windows 11, the text will appear in the style that you set above.
Use CC on Windows
This is the easiest and the only way to enable closed captions or live captions on Windows 11. This option is a lifesaver for many people who have difficulty in playing sound in the public or have hearing disabilities.


