
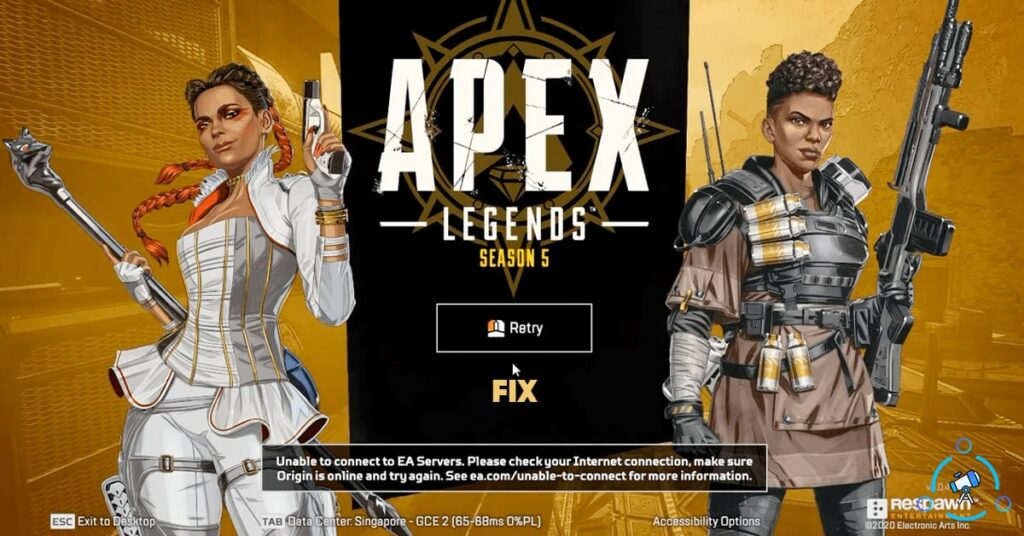
Apex Legends by EA Sports is one of the most played adventure games out there. The game is highly interactive and a lot of people play the same on a day-to-day basis. Oftentimes, a lot of people face connection timeout errors while opening the game. An error message stating Apex Legends is unable to connect to EA servers pops up.
If you are someone who is facing this error frequently then read the article to find fixes for the same. We have mentioned multiple methods to solve Apex Legends not able to connect to EA errors. You might want to try multiple fixes to get it working again.
This error appears on both PC as well as PS4. So, you will also find how to fix Apex Legends unable to connect error on PS4 as well.
So, let’s see how to fix Apex Legends unable to connect to the EA server in less than 5 minutes. Once fixed, you can start playing the game without any issues.
How To Fix ea.com/unable To Connect Apex Legends Error
As the error itself mentions, the error can sometimes be related to your Internet connection. So the first thing you want to make sure is, your Internet connection is working without any issues. Internet connectivity issues can sometimes lead to this sort of errors.
Once you found there are no issues with your Internet connection then move to the steps given below to easily fix the problem with Apex Legends.
Use a VPN to Play Apex Legends (Sure Fix)
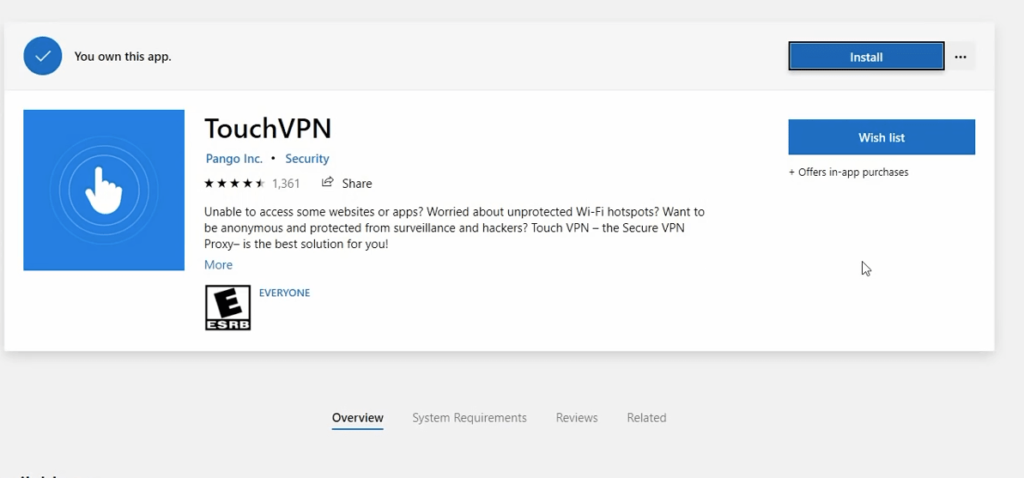
This method is the easiest and most working as per Apex Legends players. Connecting to a VPN server will fix the issue in no time. All you have to do is simply download and install a free VPN app from the Store and you are all good to go.
Let’s see how to solve Apex Legends connection error using a VPN:
- Open Microsoft Store and search for Touch VPN
- Install Touch VPN to your computer
- Once installed, open the app and click on the Connect button
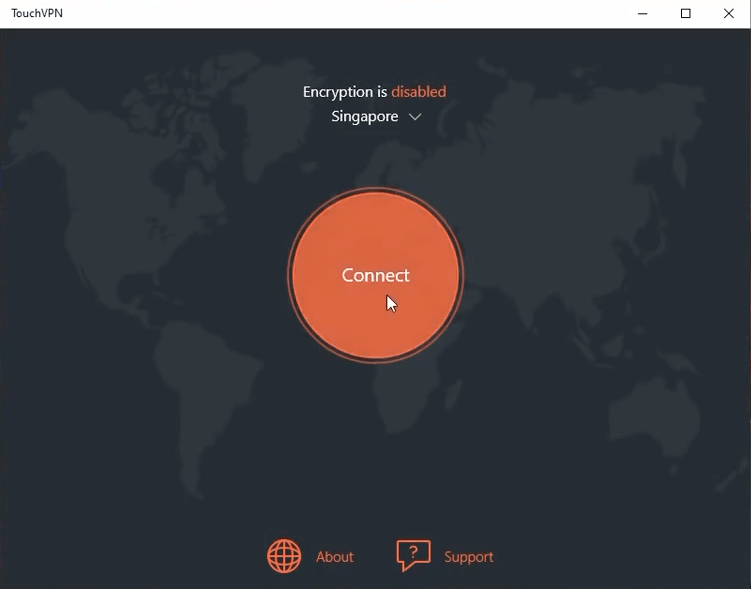
- Once connected, open Apex Legends again and this time, it should work without showing any error
The reason why I included this method at the top of the list is that it works most of the time. A lot of people have found this method works, so give this a shot.
Restart Apex Legends Game
First of all, let’s start with simple solutions. After encountering this error, did you restart the game to fix the issue? Most of the time, people forget to perform basic troubleshooting methods like restarting the game itself.
If there is some sort of network error with the game, a simple game restart might help you solve the issue. It doesn’t matter if you are playing the game on your PC or gaming console. All you have to do is simply close the game and open it back again. Now look and see if the error has disappeared or not.
Restarting the game might seem silly but can sometimes fix the whole issue.
Restart your PC or PS4
Network-level changes can sometimes lead to issues like this with other games and applications. And most of the time, it might have nothing to do with the game. Changes to the network settings made by other applications can sometimes introduce issues like this. If there are pending network-level changes to be done or a restart is pending then an error like this can pop up.
Check if you recently installed any software that changed the network adapter settings or modified the firewall settings, etc. If that is the case then first try to restart your computer to fix the error. If restarting didn’t help then try disabling the application that you installed earlier.
Clear Apex Legends Cache
Cache files are unused and unwanted files stored on our computer. Over time, the size of the cache files will increase and makes our system laggy. Sometimes it can lead to misconfigurations as well.
So, in this method, we are going to clear the whole Apex Legends cache files from our computer. Clearing so will also help us to free up some space as well.
Follow the steps given below to clear Apex Legends Cache from your Windows computer.
While performing the process mentioned below, make sure that Apex Legends and all related services are not running in the background. If the game is running in the background, then Windows won’t allow you to delete the cache files as they might be in use.
Step 1: Press Windows Key + R keyboard shortcut to open a Run command window.
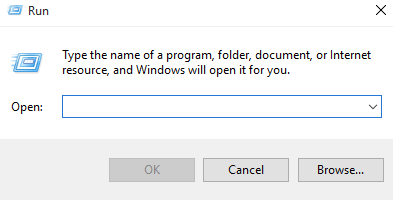
Step 2: Once opened, just type %ProgramData%/Apex Legends in the given field and hit enter or click OK. As soon as you hit enter, it will open the cache folder of the Apex Legends game.
Step 3: Here, you will find a couple of folders and files. Delete all files except LocalContent and Disclaimer folder. (Make sure not to delete these two folders as they are important when it comes to Apex Legends). You can go ahead and delete all other folders in the cache folder.
Step 4: Press Win Key + R to open the Run window again and this time, type %AppData% and hit enter. From here, delete the Apex Legends cache folder too.
Once you have deleted all the cache files and folders, open Apex Legends again to see if the problem has been fixed or not.
Try Changing the DNS
Did you know that depending on the DNS you are using the Internet speed and performance varies a lot. You can use any DNS benchmarking tool to find the fastest DNS server to use. If you are using the default DNS by your ISP then changing it to Google DNS or Cloudflare DNS might help you solve the Internet-related problems. Similarly, you may also try flushing the DNS cache as well.
On your Windows computer, follow the steps given below to change the DNS server. The steps are the same for both Windows 10 and Windows 11.
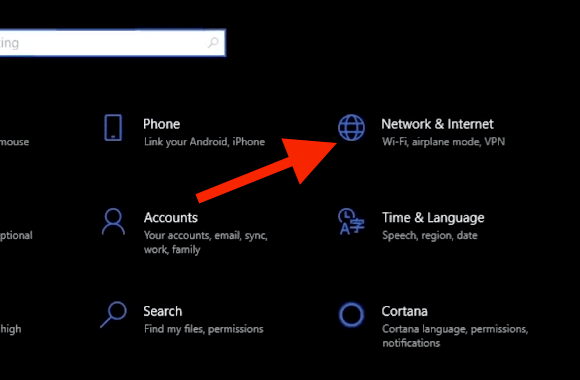
Step 1: Open Windows Settings and click Network & Internet settings option.
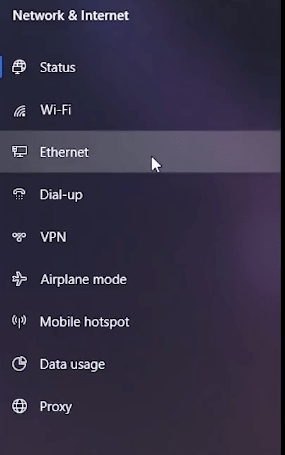
Step 2: From the options on the left side, select the internet source. Select WiFi or Ethernet.
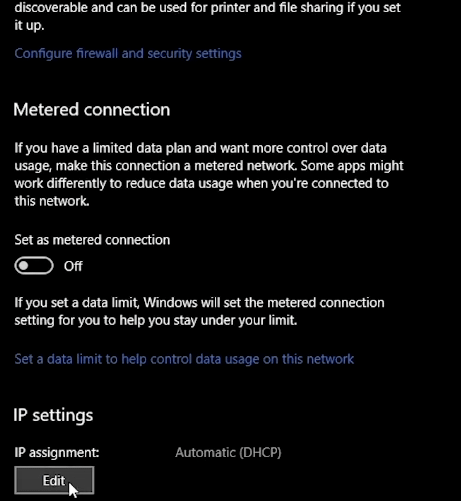
Step 3: Now select the WiFi/Ethernet network connection and scroll down a bit to find IP Settings. Click on the Edit button to make changes to the DNS server.
Step 4: From the Edit IP Settings drop-down menu, select Manual. Now enable IPv4.
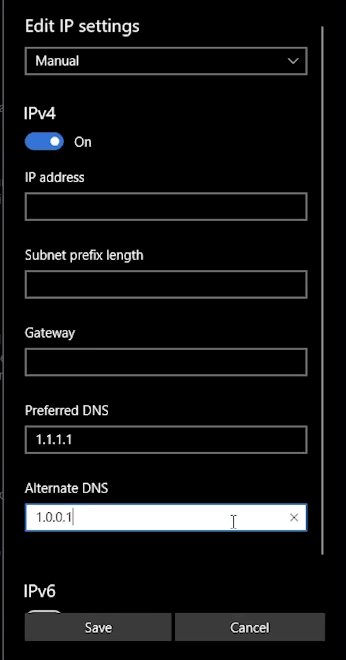
You will find two fields to enter Preferred DNS and Alternate DNS. Refer to the DNS of Google and Cloudflare and fill the field accordingly.
Google DNS: 8.8.8.8 & 8.8.4.4
Cloudflare DNS: 1.1.1.1 & 1.0.0.1
Step 5: Now hit the Save button.
You have successfully changed the DNS server on your Windows computer.
Fix Apex Legends Connection Errors
These are some of the fixes that you can try to fix Apex Legends connection-related problems. It’s a common error that appears on both the Origin client as well as Steam client. The same issue can appear on both PC as well as PS4/Xbox too.