
A lot of users are reporting Memory Leak in Windows 11 lately. Memory Leak occurs when a program does not release a block of RAM to the operating system’s memory manager even when it is not in use.
Microsoft hasn’t fixed the memory leak issue in Windows 11 yet. Most people face this issue with the File Explorer app in Windows 11. In this article, we will see how to fix memory leak in Windows 11 in easy steps.

So, let’s jump right in.
How to Confirm Memory Leak in Windows 11?
Firstly, we need to make sure that the memory leak issue actually exists in our PC. Follow the steps given below to check if there is a memory leak in Windows 11.
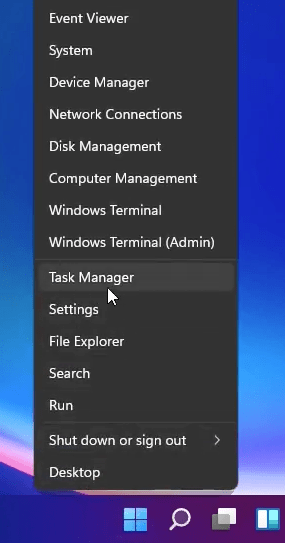
- Right click on the Start Menu button from the Taskbar and click on Task Manager to open it up.
- Move to Performance tab and click on Open Resource Monitor from bottom of the Task Manager. It will open up Resource Monitor.

- Once Resource Monitor is opened, move to the Memory tab.
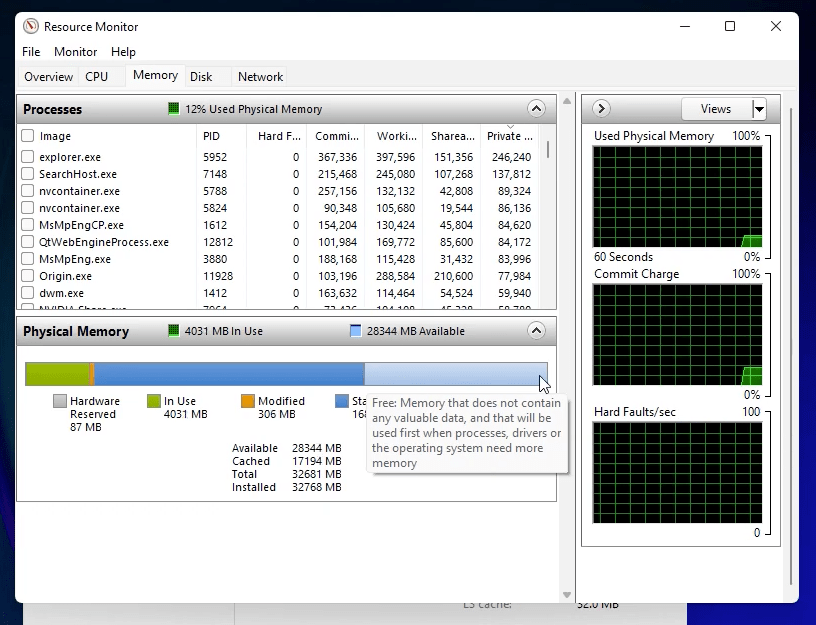
- No closely take a look at the physical memory status. Have a check on the memory consumption. If the total available ram is law even when it is done by then it means that exist memory leak issue in Windows 11.
How to Fix Memory Leak in Windows 11?
There are multiple methods that you can try to fix the memory leak issue in Windows 11. At first, we will take a look at the easy fix and then move on to other fixes to solve memory leak in Windows 11.
1. Use Empty Standby List Program
This is the easiest method to fix memory leak in Windows 11. All you have to do is, download a program called Empty Standby List and configure it to fix memory leak in Windows 11.
Head over to this page to download the Empty Standby List
(It’s a small executable file with a size of just 137KB)
Open up Windows installation drive and create a new folder named “Empty Standby List“. Now copy the downloaded file to this folder.

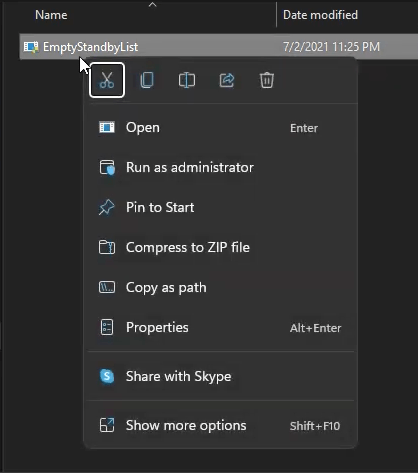
Right-click on the file and click on Properties.
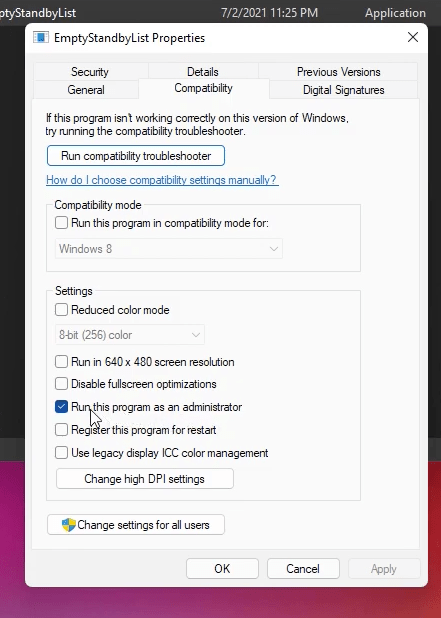
Move to the Compatibility tab and make sure to enable the ‘Run this program as an administrator option. Click on Apply and OK to save changes.
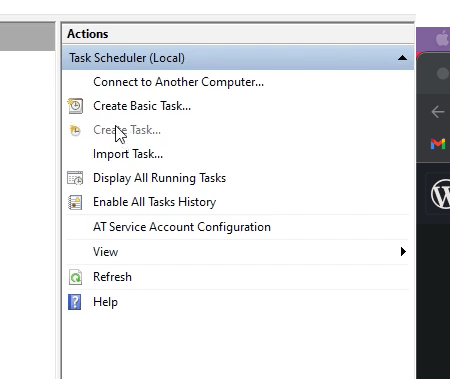
Open Windows Search and type Task Scheduler and open it up.
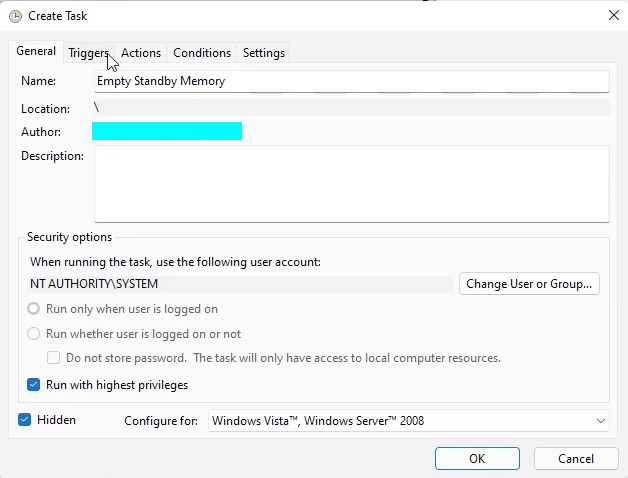
Click on Create Task option from the options on the right side of the window.
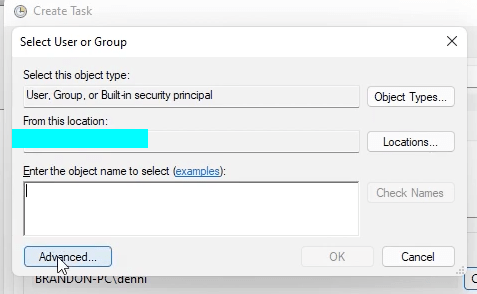
A new popup will appear. Just give it a new name and click on Change User or Group button.

On the Select User or Group popup, click on the Advanced button.
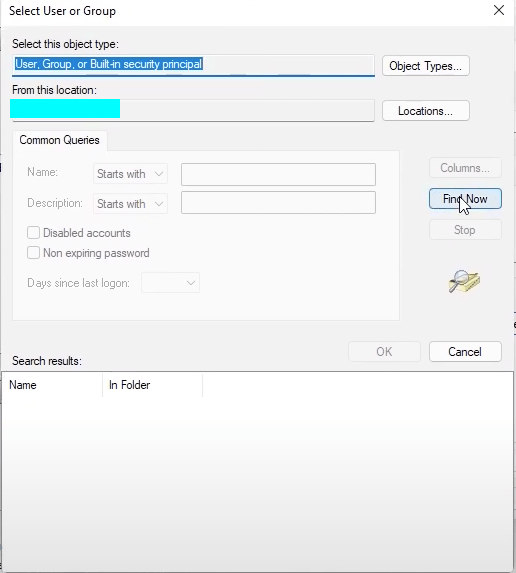
Click on Find Now
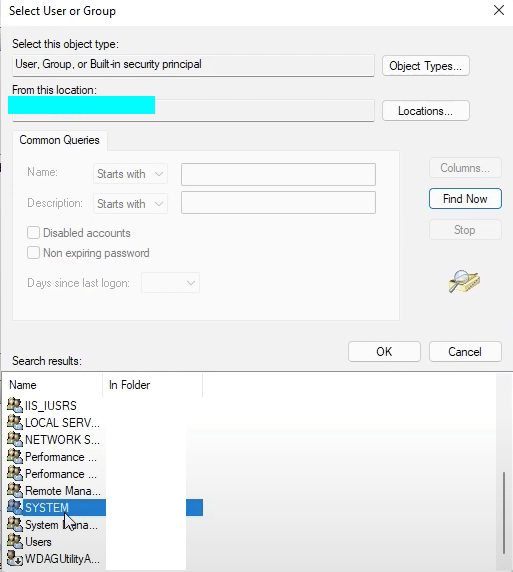
Select SYSTEM from the list and click OK and OK again.
Make sure to tick ‘Run with highest privileges and the Hidden option.
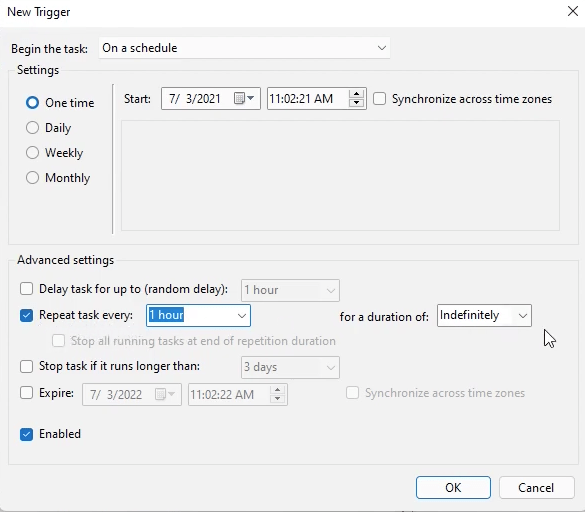
Now move to the Triggers tab > New.
Set Repeat task every day as 1 hour and for a duration of: indefinitely. Hit OK to save the trigger
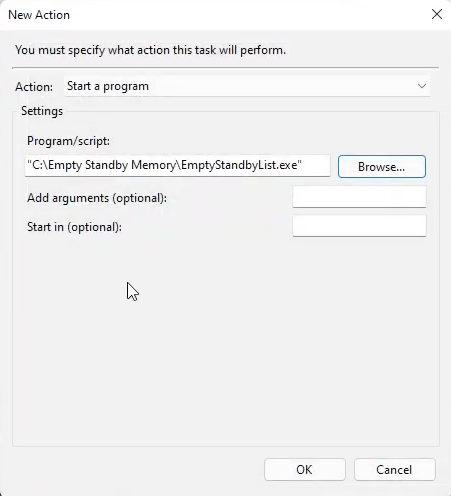
Move to the Actions tab and click New.
Click on the Browse button and navigate and find the EmptyStandyList Program and click OK.
Now click OK to save the new task.
We have successfully created a new task that will automatically clear or empty the Standby list every hour which will fix Memory Leak in Windows 11.
2. Close Windows File Explorer
Most people face memory leak issues in Windows 11 associated with the File Explorer app. To see if this is the case then right-click on the file explorer icon from the taskbar and click on Close all windows. This will close all opened and active windows of file explorer.
Now wait for a few moments and then go to resource monitor again and see if the memory leak issues still exist or not. At times, quitting Windows file explorer completely could solve the memory leak issue in Windows 11. If this doesn’t fix the problem for you then move on to the next methods.
3. See If The Issue Is Application Specific
Sometimes, the issue might be with only a single program and closing the same might solve the issue. To confirm this, open Windows Task Manager and go through the Processes list. Here, look for applications of programs using unusually high amounts of RAM.
If you found any such application then try closing it completely and see if it solves the issue or not. For example, a lot of people face memory leak issues in Windows 11 associated with Windows File Explorer.
4. Manually Free Up RAM
Another method that you can employ to fix memory leak issue is to manually free up the RAM. This means you need to open Task Manager and close programs forcefully to solve the issue.
Right-click on the Task Bar and click on Task Manager (or press Ctrl + Alt + Del and open Task Manager)
Move to the Processes tab to find all services and programs that are currently active. You need to right-click on those tasks and click on the End task button to manually quit it. Repeat the same process for other tasks and this way you can manually free up RAM.
If you face taskbar freezing issue then here is a fix for it.
What is Memory Leak in Windows?
Memory leak issue is when the RAM is refusing to release the memory allocated to Windows File Explorer even when no instances of it is running. This means, even when the File Explorer is not running, it is still holding some memory which causes a memory leak in Windows 11.
If you have a computer with a low amount of RAM then you will notice memory leak issues faster than others with a high amount of RAM. Most of the time, people with computers having high RAM won’t even notice the issue.
Also, take a look at some cool Windows 11 skins and themes.
Solve Memory Leak in Windows 11
These are some of the working methods that you can try to fix memory leak in Windows 11. Even if you are a Windows 10 user, the same methods mentioned in this article will work for you as well. The easiest method is to use EmptyStandBy list application to clear the standby list after every specified interval of time. This way, the program will do the job and you are not required to free up the RAM manually every time.
If you do not want to use any third-party application, then you may manually free up the RAM to fix the memory leak in Windows 11 or Windows 10.