Error 404, the connection has timed out, the site can’t be reached, are you familiar with this situation? If yes this article is for you.
This problem is very irritating, and it is a common problem. What we all think when we first encounter this situation is maybe the wifi is not working, but sometimes the problem is not with the wifi, you can open other sites but one specific site won’t open, no matter how many times you restart your wifi.
If you want to fix this problem you are on the right path, just follow the instructions given below.

Wondering why this happens? Well, there can be a few reasons but there is no certain answer for it. To solve this problem you can try some of the following methods.
- Restart your wifi router
- Restart your computer
- Use safe mode in windows
If the methods mentioned above did not work out, stick to the article a little longer and all the possible solutions to this problem will be in front of your eyesight.
Here are some solutions you can try to fix the “website not loading ” problem.
Try Using A VPN
If you can’t access a particular website, you can try using a Virtual private network (VPN). It can help you to access sites that are not available in your region or maybe the website is blocked for some reason. Vpn uses a different server so that you can access the desired website without any regional restrictions, it also changes the location.
Switch Device
A very effective and quick way to solve this problem can be using another device or maybe another browser. Well, this will not fix the problem on your current device/ browser but this method can save you time. If you are on a busy schedule or at the work this method is for you.
Change DNS Server
Change DNS server address, The default DNS server may not be working properly. There are many free DNS servers available for you to use, like Google and Open DNS.
To change the DNS server follow the steps shown below.
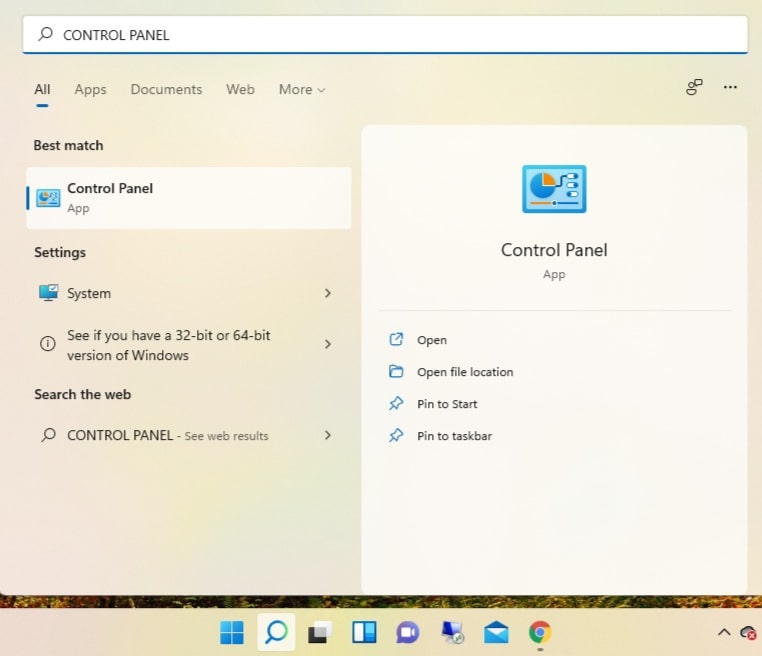
Step 1
Open the “Control panel”, you can simply search for the “Control panel” if you are using Windows 10/11, Or you can go to the start option and open the “Control panel” from there.
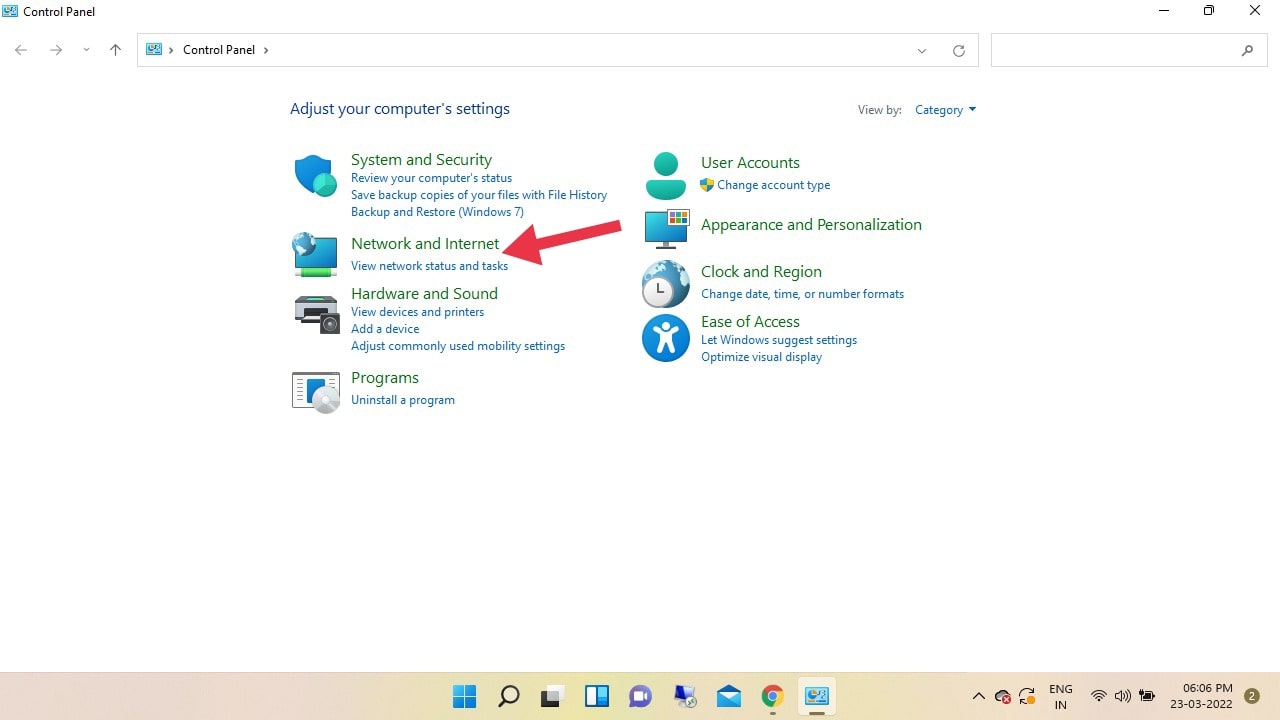
Step 2
Now in the Control panel, click on the “Network and Internet” option.
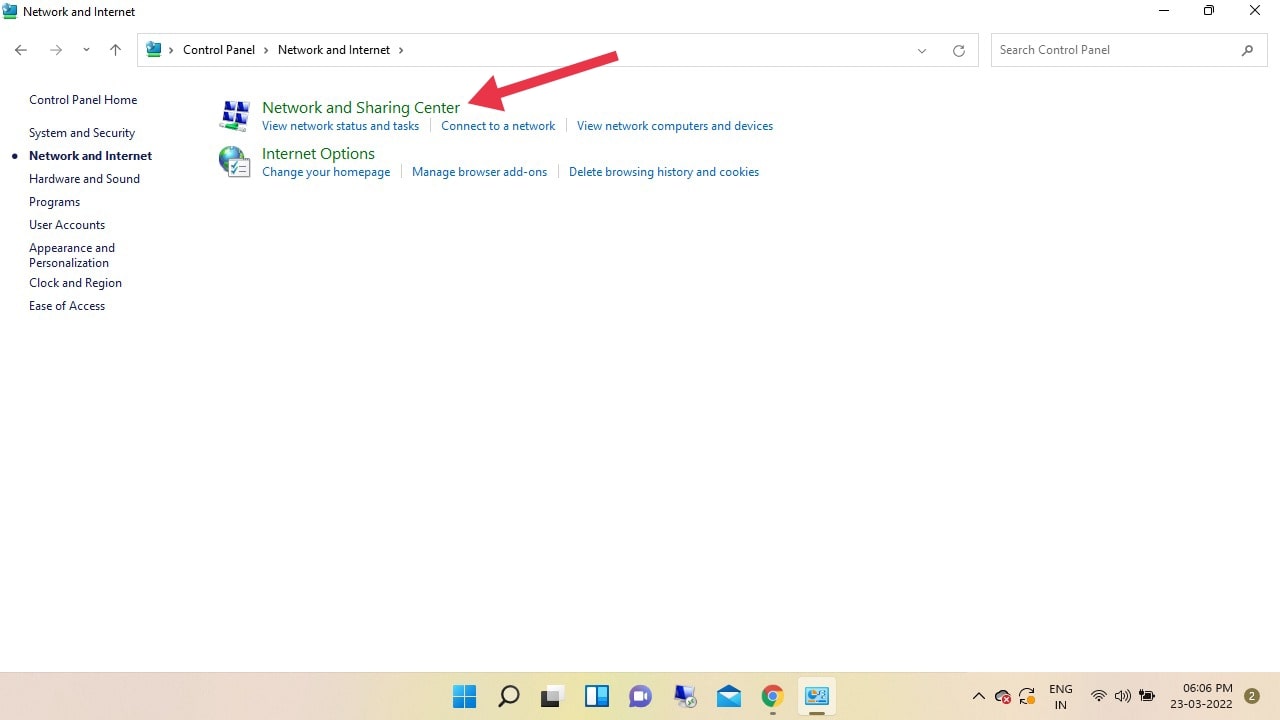
Step 3
In the “Network and Internet” section, click on the “Network and Sharing Center” option.
Step 4
Once you are on the “Network and sharing center” section, on the right side you will see the “connections” section, there you will be able to see your internet connection name. Once located click on the connection name.
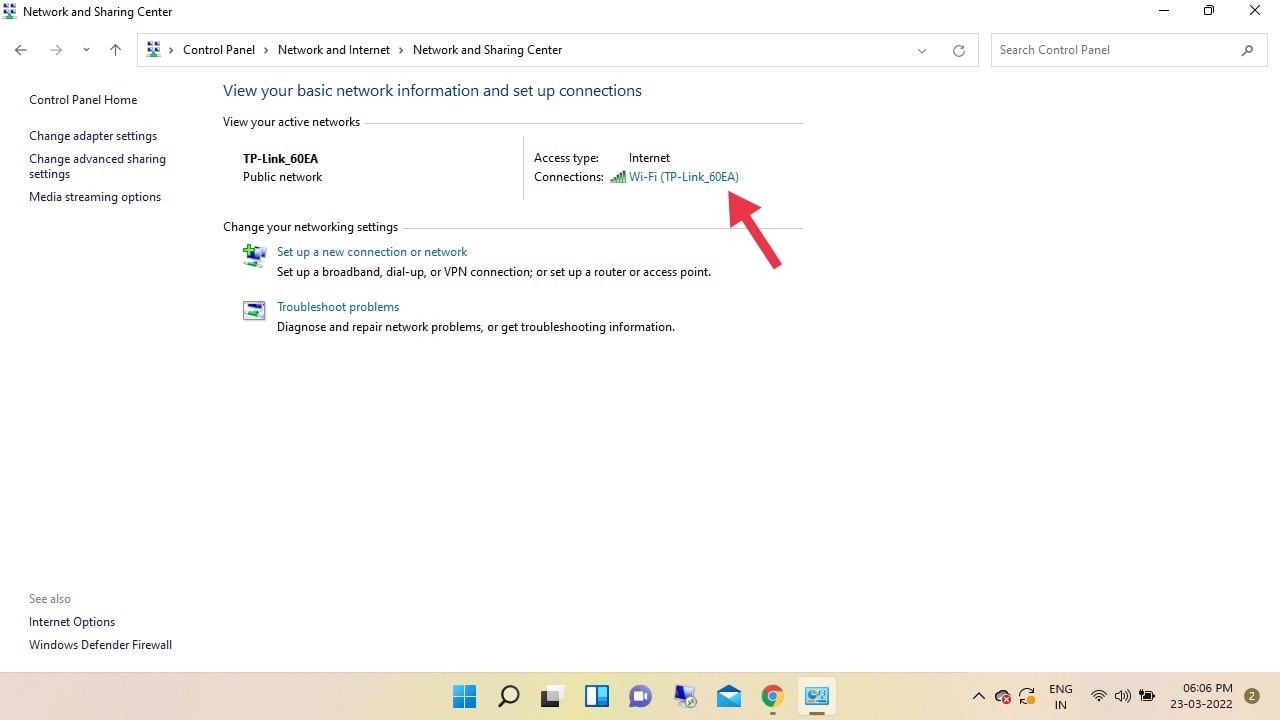
Step 5
Now you can see the Wifi status tab, on this tab click on the “Properties” option.
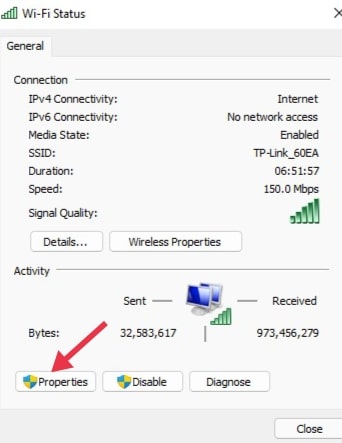
Step 6
In the Wifi properties section, double click on the Internet Protocol version 4 (TCP/IPv4).

Step 7
Now on the “Internet Protocol Version 4″ tab, you can see an option for Preferred DNS server and Alternate DNS server, fill the recommended Google’s public DNS in the DNS section.
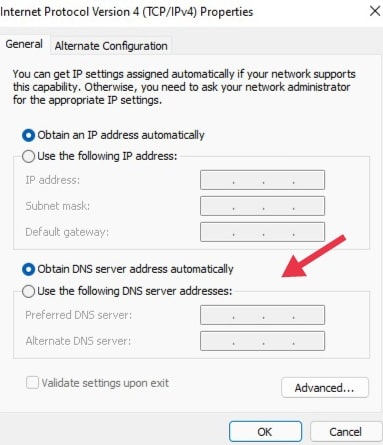
- Preferred DNS server – 8.8.8.8
- Alternate DNS server – 8.8.4.4
Save the changes by clicking ok on both of the boxes.
You can also try a few other Public DNS If the above DNS did not work.
List of public DNS
- DNS Watch – 84.200.69.80 and 84.200.70.40
- Cloud flare DNS – 1.1.1.1 and 1.0.0.1
- Open DNS – 208.67.220.220 and 208.67.222.222
- Open NIC – 206.125.173.29 and 45.32.230.225
- Uncensored DNS – 91.239.100.100 and 89.233.43.71
These are some secured Public DNS you can try.
You can also try flushing the DNS cache or even use a DNS benchmarking tool to test as well.
Enable/Disable Network Adapter
One more thing that you can try is by disabling and enabling the network adapter. There can be a scenario where different network adapters are installed on the computer, in this case, you can disable and then enable the network adapter again.
To disable and re-enable the network adapter follow these steps.
- Open the control panel and click on the “Network and Internet” option.
- Now in the network and internet section, click on the “Network and Sharing Center”.
- Now locate the option to “Change Adapter Settings”.
- Now right-click on your network adapter and then disable your network adapter once then enable it again.
Now if you see more than one network adapter in this section, what you have to do is to remove all the other network adapters except the one you are connected with.
This issue can be fixed by the given solutions, which can be seen above but just in case any of the given solutions did not work out for you, I will suggest contacting your customer support if the problem remains the same. As I said earlier, there is no specific reason why this happens, the given solution can work for one but might not work for someone else.