
One of the most interesting features in Windows 11 is the support for Android apps. You can directly install Android apps on Windows 11 without using an emulator. To take it to the next level, how about installing Google Play Store on Windows 11? Well, that’s exactly what we are about to discuss in this article.
The number of Android apps available on the Amazon Appstore is way too low and it makes sense to install Play Store on Windows 11. Once installed, you can install pretty much any Android app from Play Store on your Windows 11 computer.
The best part about the trick mentioned below is that it works even on unsupported devices. Even if your PC does not meet the minimum requirements for Windows Subsystem for Android, follow the guide given below to get Play Store on Windows 11.
Pre-requisites for Installing Google Play Store
Before diving in, you need to download a couple of files to install Google Play Store on Windows 11. You can find download links for all files right below. Visit all the links one by one and download three files to your Windows 11 computer.
- Windows Subsystem for Android Package
- ADB
- Kernal file
Once you have successfully downloaded all these files, follow the detailed guide on installing Play Store on Windows 11 given below.
How to Install Google Play Store on Windows 11
There are multiple methods to get Play Store on Windows 11. But this one is the easiest of all.
Follow the step by step guide to install Google Play Store on Windows 11. The process is a bit lengthy but I have explained everything in detail.
Note: If you had already installed Windows Subsystem for Android then before proceeding further, make sure to uninstall the same. Install the package given in this article for it to work. This way, you can install Play Store on Windows 11.
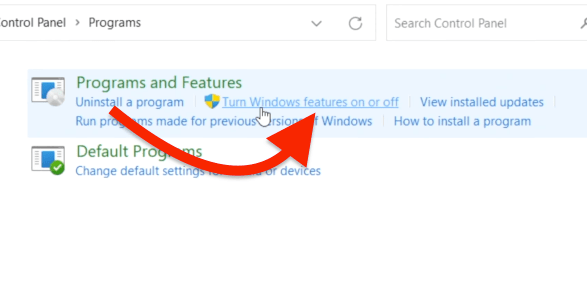
First of all, open the Start menu and search for Control Panel and open it up.
From Control Panel, click on Programs and select Turn Windows features on or off.
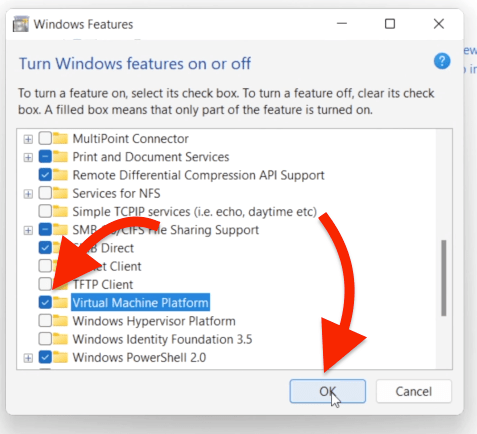
Now Windows Features pop up box will appear. Scroll down a bit and find top options called ‘Hyper-V‘ and ‘Virtual Machine Platform‘. Enable these two options and click on OK.
You need to restart your computer for the changes to take place. So, click on the Restart now button and wait till the computer boots back in.

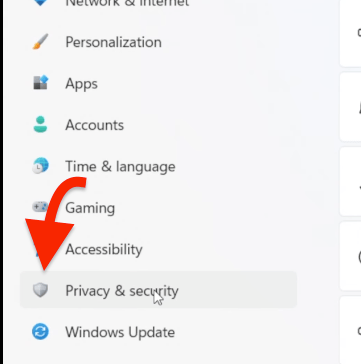
Open Windows Settings (Search for Settings or click on the Start menu and click on the cog icon to open Settings).
From the options on the left sidebar, click on Privacy & Security.
Click on the option ‘For developers‘ under Security.

Under Developer Mode, enable the option to Install apps from any source, including loose files. Just click on the toggle button to enable the same.
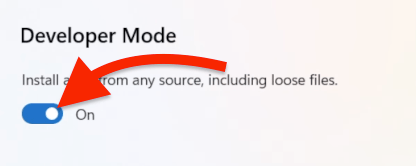
Now a popup will appear asking you to confirm the action. Click on the Yes button.
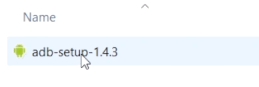
Extract the adb-setup zip file and open it up.
Double click on the adb-setup application to open it.
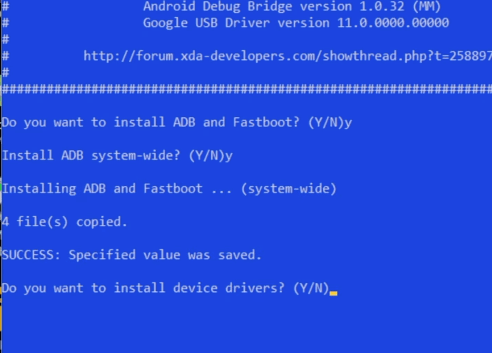
It will first ask ‘Do you want to install ADB and Fastboot? (Y/N). Type Y and hit enter.
For ‘Install ADB system-wide? (Y/N)’ type Y and hit enter.
Finally, for ‘Do you want to install device drivers? (Y/N)’ type Y and hit enter again.
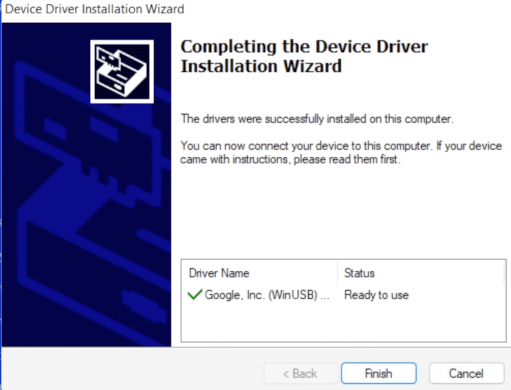
Now a setup box will show up. Click Next.
A new pop up box will appear, just click on the Install button.
Now click on the Finish button to quit the installer.
Extract the WSA Package that we downloaded earlier. Now move the extracted folder to the C drive or somewhere.
Copy the earlier downloaded kernal file and move it to the WSA package folder.
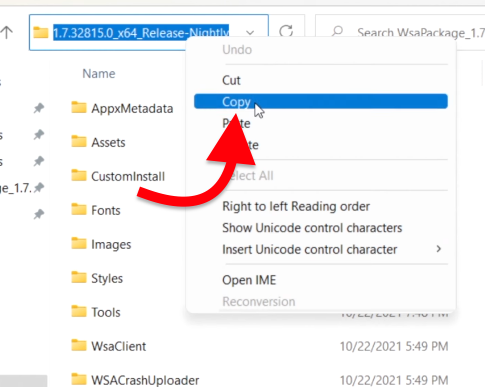
Now copy the path of the WSA Package folder. Just click on the address bar from the Windows File Explorer and copy the complete path. Keep it in the clipboard. We will need it in the next steps.
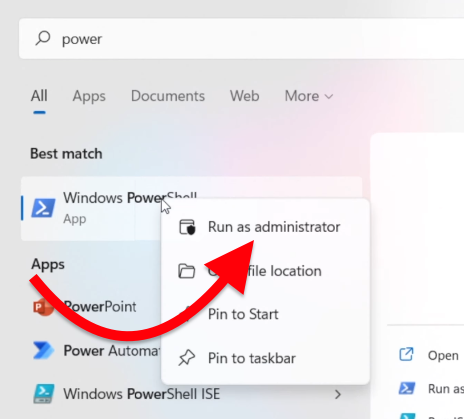
Open Search and type PowerShell and open it up. (Right-click on PowerShell select ‘Run as administrator‘)
Type the below-given command and hit enter.
cd <path>In the above command, replace <path> with the address/path of the WSA folder.

Now execute the below given command in PowerShell.
Add-AppxPackage -Register.\AppxManifext.xml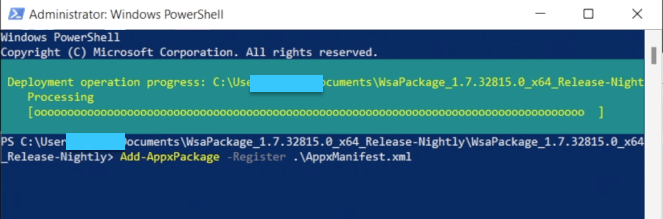
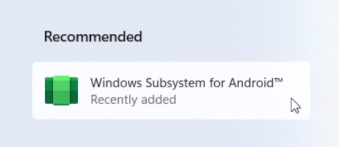
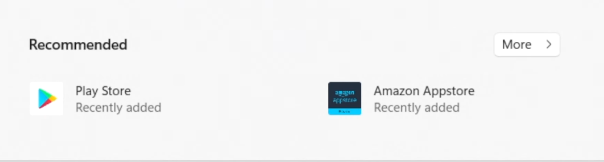
Now, if you open the Start menu, you will find Windows Subsystem for Android under the Recommended apps section.
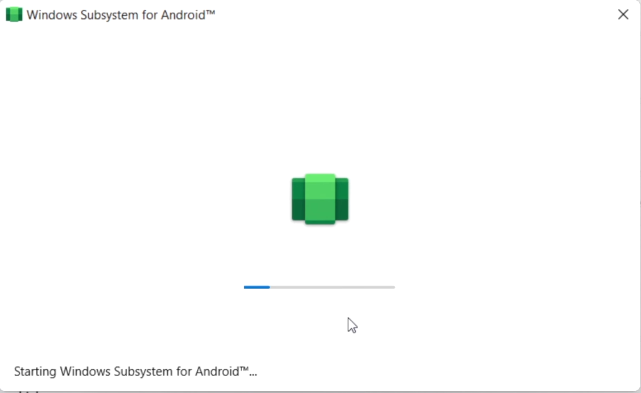
Click on Windows Subsystem for Android and open it. Scroll down a bit and enable Developer mode.

Now click on the Files option from the top and wait till Windows Subsystem for Android loads.
Once opened, launch the Start menu again and you will find Play Store and Amazon Appstore under Recommended section.
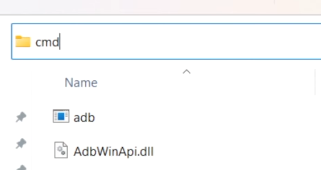
Open the adb folder again. Double click on the adb application.
Now type cmd in the address bar of Windows File Explorer from the ADB folder itself to launch Command Prompt.
Open Windows Subsystem for Android and find the IP address. Click on the Copy button to copy the IP address to the clipboard.

Head back to the Command Prompt and enter the below-given command. Make sure to replace the IP with the one that we copied in the last step.
adb connect 172.xxx.xxNow it will show a status as Connected to 172.xxx.xx.
Now type ‘adb shell‘ and hit enter.
Type ‘su‘ and hit enter.
Type and execute ‘setenforce 0‘.
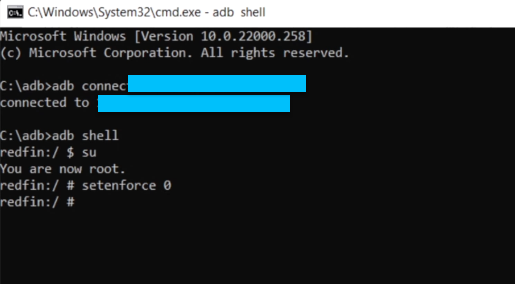
Now close CMD
Just click on the Play Store icon to launch Google Play Store.
At first, it will ask you to Sign in to your Google account.
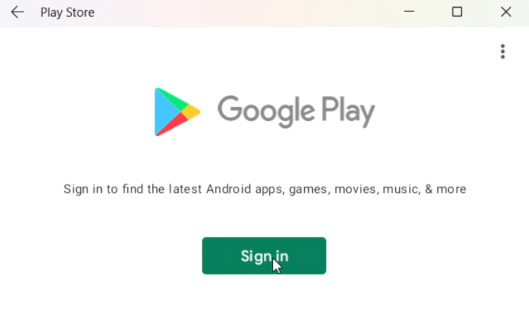
Enter the login credentials and log in to your Google account.
Once done, Play Store will open up. Now you can search for any apps of your choice and install them easily.

Any app that you install via Play Store will be shown in the Start menu. After the installation, you can find it under the Recommended section of the Start menu.
You may also try using Online Android Emulators to run Android apps in a web browser as well.
Setup Play Store on Windows 11 PC
This is how easy it is to install Google Play Store on a Windows 11 PC. When I searched online, I found a couple of methods to install Play Store on Windows 11. But all of them were lengthy and you were required to download GApps, etc and do a lot of things manually. But in this guide, I have given direct download links for a lot of files, so that you can skip a lot of steps and save time.