
TWRP Recovery is a custom recovery for Android that lets users do various tasks like flashing zip files, taking a full backup of Android, installing custom ROMs, and more.
The reason you are here is to learn how to install TWRP Recovery on your phone.
Android is a great platform and comes with endless customization opportunities. But by default, Google and your device manufacturer will limit a lot of options. This is where custom recovery, like TWRP, comes into play.
Your phone will already have a stock recovery right out of the box. The stock recovery that comes with every device is basic and does not have that many options that we want. There are no options like flashing or rooting in stock recovery.
Installing TWRP Recovery will take no more than 5 minutes. This guide is for everyone, even if you are a beginner just getting started with all this stuff.
What is TWRP Recovery?
TWRP Recovery is a custom recovery for Android that comes with tons of dedicated features to customize Android and perform various system-level tasks restricted by your OEM. With the help of TWRP Recovery, one could flash custom ROM, Root smartphone, take full back, and a lot more. TWRP is an open-source project and for the same reason, you will find both official as well as unofficial builds.
Every Android device is not the same. TWRP recovery for one smartphone won’t work on the other. You will have to find your device-specific TWRP Recovery in order to install it.
This is a full guide on how to install TWRP Recovery on your smartphone with the help of ADB and Fastboot.
How to install TWRP Recovery on Android?
Installing TWRP Recovery is not that tough as you might think. If done properly, you can get it installed on your device within the next 5 minutes. There is a couple of software and a PC that you will need to perform this task.
Install ADB and Fastboot on your Computer
The very first thing you want to do is to prepare your computer for the process. For this, you have to install and setup ADB and Fastboot on your computer.
Setup ADB and Fastboot – follow the guide and install it on your computer. It hardly takes less than 5 minutes to get it running.
Once you are done installing ADB and Fastboot on your computer, let’s move to the TWRP installation part.
Download TWRP Recovery for your Device
Next main step is to download the respective TWRP Recovery file for your device.
You may go to the official website and then search and find your device from there. Download the .img file and keep it in an easily accessible location for now.
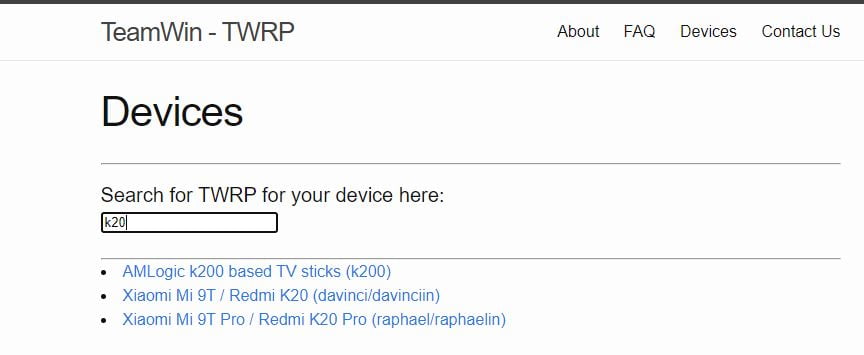
For some reason, if you didn’t find an official build for your device then you could go to public forums like XDA to check if an unofficial TWRP Recovery build is available for your device.
As TWRP Recovery is an open source and community supported project, chances are you will find unofficial build for almost all smartphones out there. It might be becuase your phone is too old or new that you were not able to find an official build.
Install TWRP via Fastboot
Make sure that bootloader is unlocked already, if not then go ahead unlock bootloader before proceeding further.
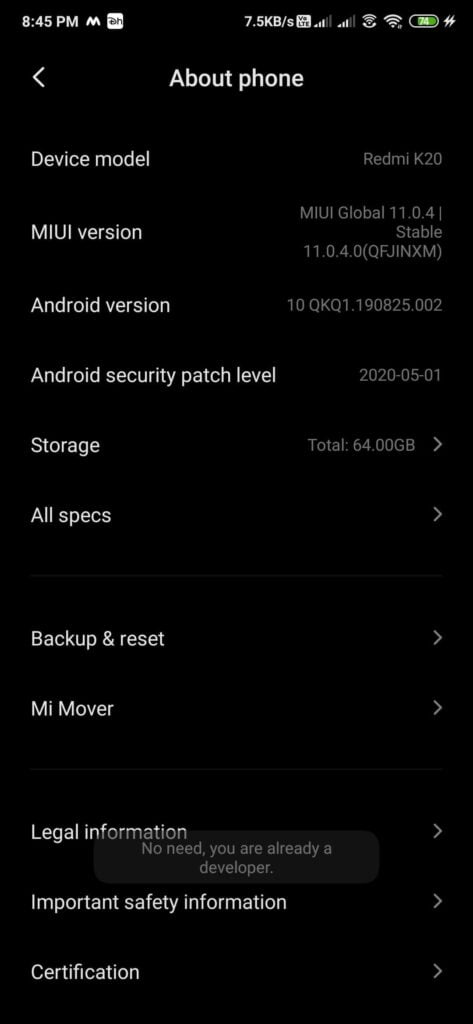
1. Go to your smartphone’s Settings > About Phone > Tap on the build number 7 times to enable Developer options.
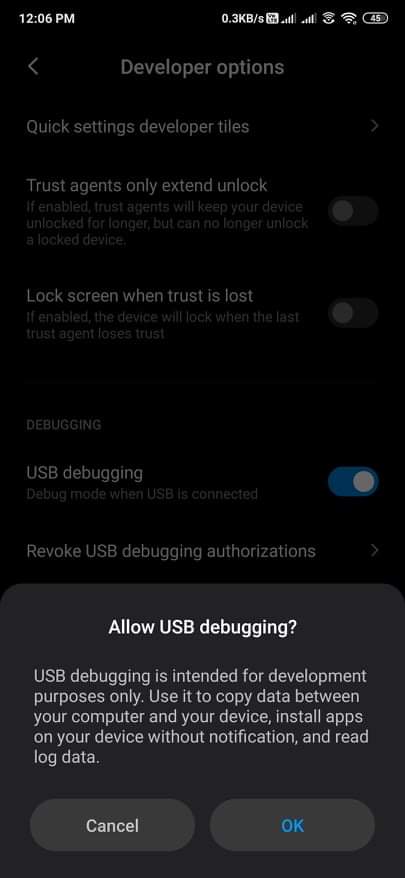
2. Once enabled, go to Developer options can enable USB Debugging on your device.
3. Copy the downloaded TWRP Recovery image to ADB folder.
4. Connect your device to computer using USB Cable
5. Now, open the ADB folder and right-click anywhere on the screen with Shift key pressed. And select “Open command window here” option.
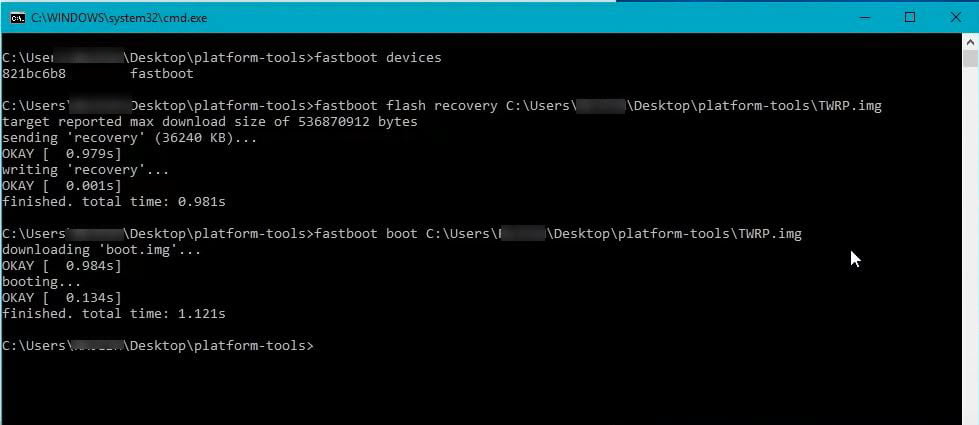
6. Once the command window is opened, run the below given command to reboot into fastboot mode.
adb reboot bootloader
7. After your device entered fastboot mode, run the below-given command to flash the downloaded TWRP Recovery image file. Make sure to replace image.img with the exact filename of the file you downloaded.
fastboot flash recovery image.img
8. Wait for a moment until the process is done.
9. Once it’s done, simply use this command to reboot your phone.
fastboot reboot
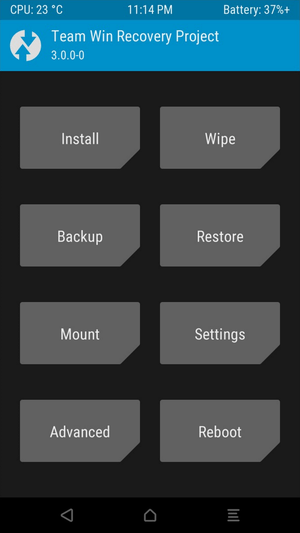
We have successfully installed TWRP Recovery on our phone.
Now you can easily flash custom ROMs, root your device, or do whatever you like. Always make sure that you take a full backup of your device before doing anything as we can easily restore it back if anything goes wrong.
How to open TWRP Recovery?
To boot into TWRP Recovery all you have to do is simply hold the Volume up + Power button. It will open TWRP Recovery instead of the stock recovery.
Now that you have installed TWRP Recovery, you might want to Root your device to perform core customizations. I recommend you to use Magisk to root your phone as it uses the systemless rooting method. We already have a complete guide on downloading and installing Magisk on Android.
If you ever want to get rid of TWRP Recovery and install stock recovery then follow the steps below:
- Download the official stock recovery for your device from the Internet. You may find it from your device’s manufacture support forum or some other public forums.
- Now repeat the exact same procedures given above. Instead of the TWRP Recovery file, just replace it with the stock recovery file and you are all good to go.
- After flashing, stock recovery will be installed on your device.
This is how easily we install TWRP Recovery on Android. You need not be a super techy person in order to do this. It hardly takes 5 minutes to get everything done. If you are someone like me who loves playing with custom ROMs and customizations then this will definitely come in handy. Always remember to take a full backup before making any modifications via TWRP Recovery. If anything goes wrong or your phone gets soft bricked, we could easily fix it by restoring the old backup.