
Magisk is a great tool for Android users who are looking to easily root Android. There are some key features that make Magisk 22.1 different from every other app. First and foremost, Magisk uses a systemless root method which has many advantages. Next is the fact that you can easily hide the root status with the help of Magisk Manager.
In this article, you will find how to download magisk zip and Magisk manager 8.07 latest version, install and root Android easily. Even if you are new to this, don’t worry as things are very simple with the help of the Magisk Manager app.

There are a number of other tools like SuperSU, but they are not making use of the systemless root method. This is the unique reason why everyone loves Magisk. The main advantage of Magisk is that it does not modify the system partition, so your device will continue getting all the OTA updates and you can easily run any banking related apps without any issue by hiding root status.
What is Magisk?
Magisk is a simple flashable zip file that could let you easily root your Android device. There are multiple methods to root Android. Back in the day, people used to root Android using SuperSU, but the main problem with that was that it edited and modified the system partition directly. As the system partition is modified, Google’s SafetyNet process will fail. This is where Magisk comes into play. Magisk uses the “systemless” rooting method. In this process, the system partition is kept untouched. All the modifications are made to the boot partition only. This way, your device will pass the SafetyNet check even if it is rooted.
Advantages of Magisk
There are tons of advantages to using Magisk. You might have already got an idea regarding the biggest of all – systemless rooting.
- Does not alter system partition
- SafetyNet check pass even if rooted
- Continue receiving OTA updates
- Magisk Modules
- Magisk Manager
- Beginner friendly and easy to get started
Download Magisk ZIP and Magisk Manager Latest Version
| Name | Magisk Zip and Magisk Manager |
| Latest Version | 22.1 and 8.07 |
| Last Updated | 1 May 2020 |
| Developer | Topjohnwu |
Below you can find direct download links to the latest version of Magisk zip file and Magisk Manager. The links are directly provided by the Magisk developer itself. So it is 100 percent safe and secure for that matter.
New version change log:
v22.1
- [App] Prevent multiple installation sessions running in parallel
- [App] Prevent OutOfMemory crashes when checking boot signature on PXA boot images
- [General] Proper cgroup migration implementation
- [General] Rewrite log writer from scratch, should resolve any crashes and deadlocks
- [General] Many scripts updates fixing regressions
- [MagiskHide] Prevent possible deadlock when signal arrives
- [MagiskHide] Partial match process names if necessary
- [MagiskBoot] Preserve and patch AVB 2.0 structures/headers in boot images
- [MagiskBoot] Properly strip out data encryption flags
- [MagiskBoot] Prevent possible integer overflow
- [MagiskInit] Fix
sepolicy.rulemounting strategy - [resetprop] Always delete existing
ro.props before updating. This will fix bootloops that could be caused by modifying device fingerprint properties.
For some reason, if the latest version of Magisk is not working for you, you may use the older versions. Below, you will find links to those.
How to Install Magisk and Root Android
Installing Magisk is simple and easy. There are two methods to install and setup Magisk on your phone. The first one is to use TWRP Recovery and the second one is to install Magisk with Patched Stock Boot Image. You can use any method that you feel is convenient for you.
It doesn’t matter if your device is already rooted or not. If you are already using some other tools like SuperSU and wanted to change to Magisk, it is also easy. All you have to do is get rid of the old root tool and then flash Magisk Zip freshly.
Install Magisk with TWRP Recovery
There are two main steps in this method. The first one is to install TWRP Recovery and the flash the Magisk zip file via TWRP Recovery. If you are having TWRP Recovery already installed on your device then you may jump to the second step of this method directly.
Install and setup TWRP Recovery
At first, we need to install TWRP recovery. It is a little bit longer process, but don’t worry, we got you covered.
1. First of all, you need to download and setup ADB and USB Driver. Follow this guide to setup everything.
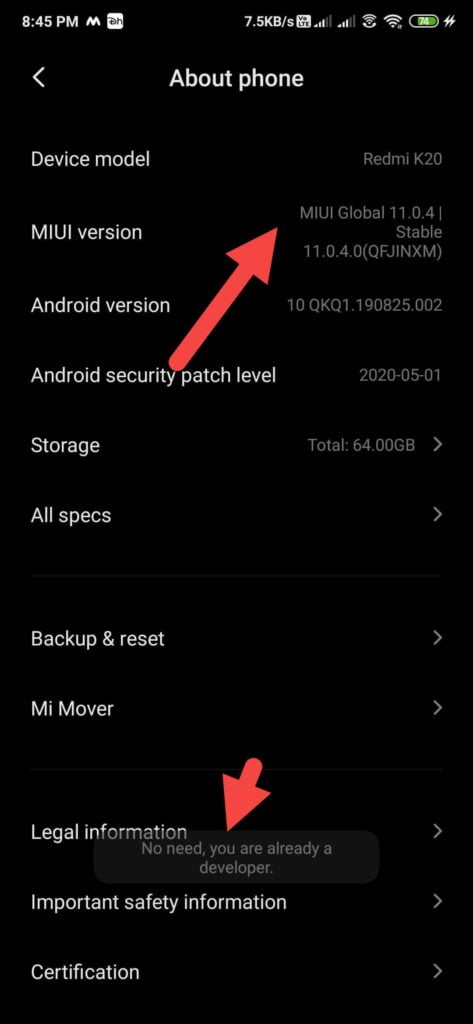
2. Follow the guide given above and setup ADB and Fastboot on your computer. Once done, you need to enable Developer Options on your device
3. Go to phone’s Settings > About Phone > tap on the build number for 7 times to enable Developer options.
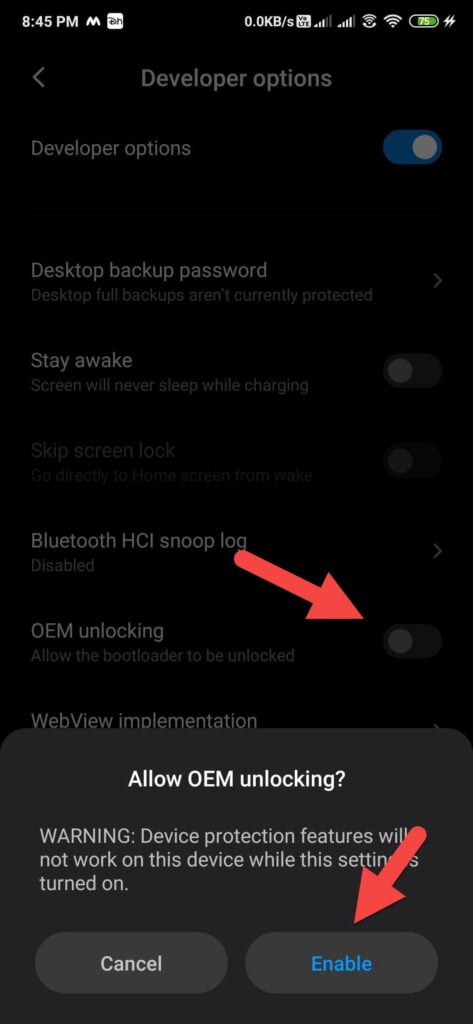
4. Go to Developer Options and find the option called “OEM Unlocking” – Enable it.
5. Next is to unlock the bootloader. Doing so will wipe complete data on your phone. So, it is advised that you take a backup of all important files.
Connect your Android smartphone to computer with USB Cable and launch ADB.
6. Use the below given command to quickly unlock the bootloader
Android 6.0 or above
fastboot flashing unlock
Android 5.1 or lower
fastboot oem unlock
To navigate and select options, you could use the volume up and down button, and to confirm you may use the power button. After this is done, the Bootloader will be successfully unlocked.
7. We have successfully unlocked our phone’s bootloader, next is to install TWRP Recovery. First of all, download the TWRP image from here (the image will be different depending on the device) and extract the content into the ADB and Fastboot folder.
8. Power off the phone and then press and hold Volume up + Power button to open Bootloader menu
9. Open the ADB folder and right-click anywhere inside file explorer while keeping the Shift key pressed. You will find an option called “Open Command Window Here”, just click on it.
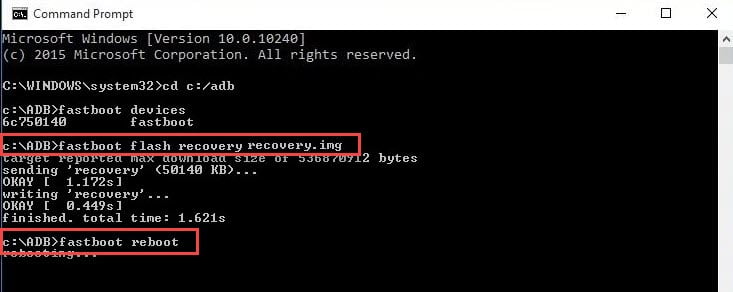
10. On the command window that popped up, paste the below given command with necessary modifications.
fastboot flash recovery imagefile.img
Replace imagefile.img with the name of the image file you downloaded earlier in step 7.
11.. Once flashing is done, use the command below to reboot your device.
fastboot reboot
That’s it. We have successfully installed TWRP Recovery on our Android smartphone.
Install Magisk with TWRP Recovery
Now that we have TWRP Recovery installed on our phone, next is to flash the Magisk.zip file on our phone.
Make sure that you copy the Magisk.zip file to root internal storage for easy access.
1. Boot into TWRP Recovery
2. Tap on the Install button
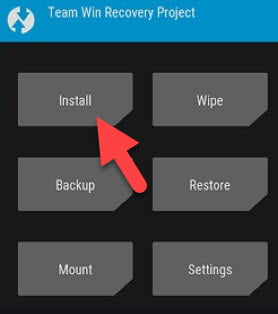
3. Navigate and find the Magisk.zip file we downloaded earlier.
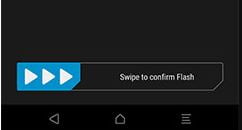
4. After selecting the file, swipe to confirm.
Wait for a while until Magisk gets flashed onto your device.
Once done, restart your phone and you have successfully installed Magisk on your Android device.
Next is to install the Magisk Manager app that we downloaded earlier to make modifications to our phone. Everything is done.
Conclusion
This is how easily we install Magisk on our phone and root it. If you want to uninstall Magisk and unroot your phone, you can do the same by using the Magisk Manager app or flashing the Magisk Uninstaller zip file via TWRP. If you have doubts, comment down below.