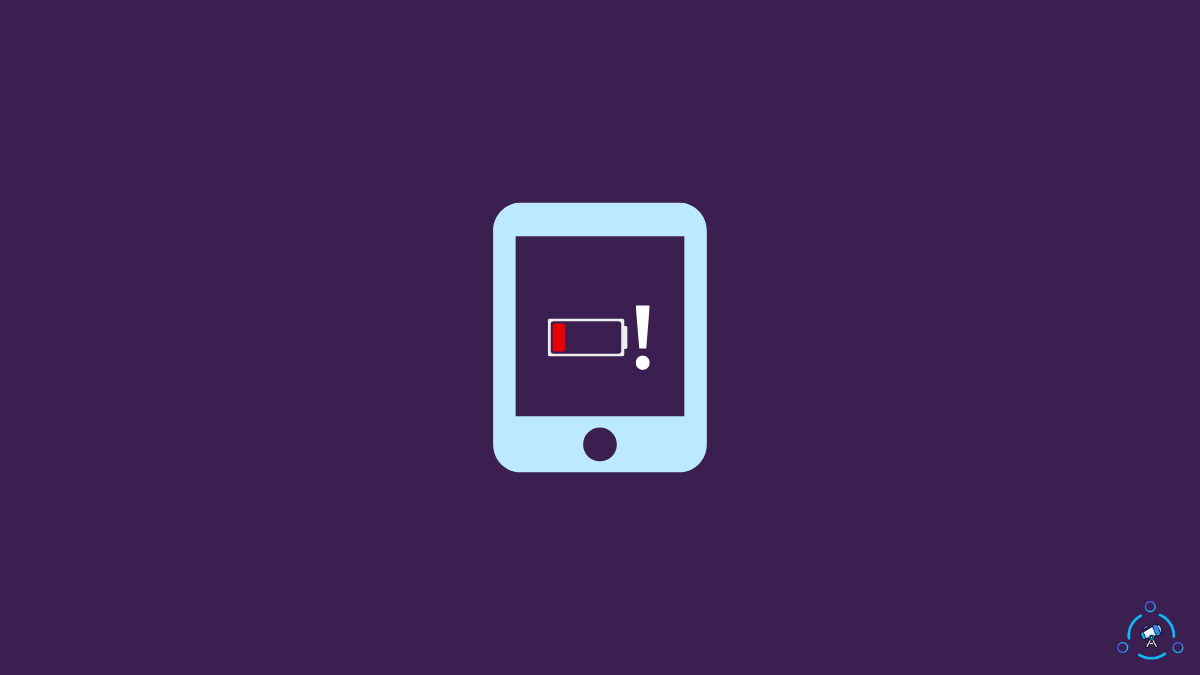
You grab your Kindle and press the power button. Suddenly, a battery exclamation mark appears, and the Kindle won’t go past it.
Initially, when you see the Kindle battery exclamation mark for the first time, it will be scary. But worry not, as in this article, I will explain what the Kindle battery exclamation mark mean and what you want to do to fix it.
A battery icon with an exclamation mark on your Amazon Kindle screen means the battery is either completely low and needs to be charged or there is a problem with the battery, making the Kindle not turn on.
The Kindle battery exclamation mark is a very common problem that is faced by many Kindle users.
Follow the steps by step guide below to fix it in no time.
What Does the Kindle Battery Exclamation Mark Mean?
When your Kindle battery is running extremely low, or the Kindle is unable to power up using the battery, a battery icon with an exclamation mark appears on the screen.
In most cases, it appears when there is little to no charge left in the Kindle battery. In rare cases, it also indicates a problem with your Amazon Kindle battery.
- Kindle Battery Low: For the Kindle to turn on and work properly, a certain amount of battery should be left. A Kindle will turn on and work fine even on 5 percent mark. But if the battery charge drops below 2 or 1 percent, it becomes unable to turn on. When the battery is too low, it will even show a Kindle Critical Battery error.
- Kindle Battery Problem: In certain cases, the exclamation mark appears on the battery icon when there is a problem with your Kindle’s battery. If the battery is faulty or if it is unable to charge and power up the Kindle, you may expect to find the exclamation mark on the screen.
In both these cases, you won’t be able to use your Kindle as you can’t go past the battery icon with an exclamation mark screen.
So to start using your Kindle again, you must first fix the problem.
Fix Kindle Exclamation Mark On Battery Icon
Now that you are aware of the reason why an exclamation mark appears on the battery icon, let’s see what you do to fix it right away.
Charge The Kindle
As you already know, the primary reason why Kindle shows an exclamation mark on the battery icon is because of the low battery charge.
The first thing you need to do is to grab your Kindle charger and charge it.
If it’s been a while since you charged your Kindle, you must charge it for longer before turning it on.
I recommend you wait 30 minutes to an hour before trying to turn on the Kindle. If the battery percentage is too low and old then it will take some time for the Kindle to charge.
If nothing happens even after charging the Kindle for more than 30 minutes, then it’s time to try other troubleshooting methods to fix the problem.
Check The Charger
The issue need not be always with the Kindle itself. If your Kindle is not charging, it may also be due to a faulty charger.
If you connected the charger to the Kindle, but it isn’t charging, you should try a different charger and see if it charges this time.
Trying a different charger will help you identify if the problem is with the current charger you have.
If your charger is faulty, you need to get a new one. You can get a charger compatible with your model of Kindle off Amazon.
Reset Kindle
Force resetting Kindle is something you should do in an event where Kindle does not work properly. Since the battery exclamation mark does not go away even after charging it, we must try resetting it.
Resetting an Amazon Kindle won’t take more than five minutes. So let’s see how to quickly reset a Kindle to fix charging issues.
- Firstly connect your Kindle to the computer using a USB cable. As soon as you connect the Kindle to the computer, an orange light will appear. It indicates the Kindle is currently being charged.
- Once the orange light appears, press and hold the power button of the Kindle for 40 seconds.
- After 40 seconds, release the power button and see if the screen blinks once.
- Press the power button again to turn on Kindle.
If the Kindle does not respond after clicking the power button, leave it connected to the computer for at least 30 minutes and try pressing the button once again.
Hopefully, this time, the Kindle should come back to life.
If it doesn’t turn on, it’s time to try some advanced fixes.
Reconnect The Kindle Battery
Only try this method if you have tried every other method above and your Kindle is out of warranty.
So far, we have tried everything from charging the Kindle and performing a soft reset. The next step is disconnecting and reconnecting the battery from the Kindle’s motherboard.
Suppose you do not have any technical expertise in removing the back panel of Kindle and reconnecting the battery. In that case, I strongly advise you to take the Kindle to the nearest electronic store and let them help you.
Opening the back of the Kindle needs a little bit of effort.
Before starting, you will need a prying tool and a screwdriver.
Refer to the video for more clarity:
Insert the prying tool between the back panel and tilt it slightly to open the front bezel. You may also insert your finger in the gap to open it up fast.
Now you need to use a Phillips screwdriver to unscrew all the screws around the screen. Now that you have removed the screws lift the back panel to reveal the battery.
Simply disconnect the battery and reconnect it again.
Once connected, put the screws back and close the back panel.
Try to charge the Kindle once again and turn it on after 30 minutes.
If it doesn’t work even after reconnecting the battery, the battery might have got faulty. You need to repeat the same process above, replace the battery with a new one, and try again.
Contact Support
If none of the troubleshooting steps above helped you, the final thing to do is to get in touch with Kindle support and explain the problem.
If your Kindle is still covered under warranty, you could get it repaired or replaced for free of cost.
Most Kindle models come with one year limited warranty, and certain models for kids come with a two-year limited warranty.
Refer to the purchase invoice and see if your Kindle is still covered under warranty. If yes, get in touch with customer support to claim your warranty.
How to Know if the Battery is Charging When Kindle is Dead?
When you charge your Kindle, a bolt or flash icon will appear near the battery symbol. Now that your Kindle is not turning on, you won’t find the bolt symbol on the battery icon.
Since your Kindle is dead, you will only see a battery icon with an exclamation mark. In this situation, to know if your Kindle is charging, you only need to check the orange charging indicator LED.
After connecting the charger, see if the orange LED glows continuously. If the orange light does not glow or blink, it means the Kindle isn’t charging
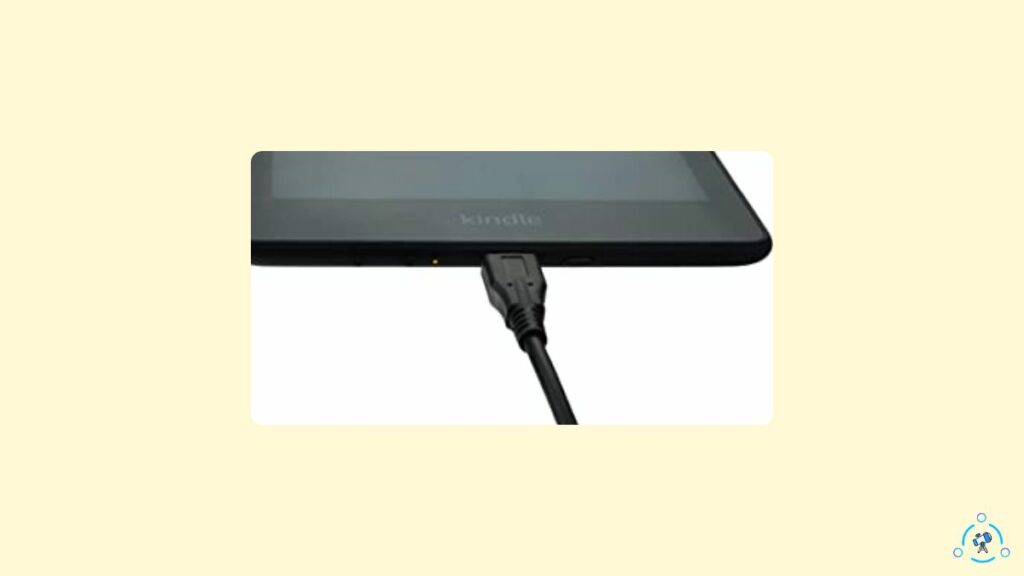
For starters, you will find the orange LED right next to the USB charging port towards the bottom side of the Kindle.
What’s Next?
Now that your Kindle started working again, you may charge it up and use it as you normally would.
In the future, if a battery icon with an exclamation mark appears on your Kindle, note that it means the battery is down and needs to be charged.
In most cases, the Kindle battery exclamation mark is not a problematic issue. The icon should quickly go away after charging your Kindle. If it does not go away after charging, there is some problem with the charger or the Kindle battery.
So let’s quickly go through what we did to fix the problem:
- Charge Kindle
- Reset Kindle
- Ensure the charger is working properly
- Reconnect the battery
- Contact support