Blurry Instagram stories are a widespread issue among users, and there are several reasons why it happens.
You click some fantastic pictures and videos on your smartphone using that high-quality camera and post them as a story on Instagram.
After uploading, the quality of the story drops, and certain parts of the story look blurry. I know how frustrating it can be.
Let’s go through some reasons why your high-resolution Instagram story looks blurry after uploading them.
Why Are My Instagram Stories Blurry?
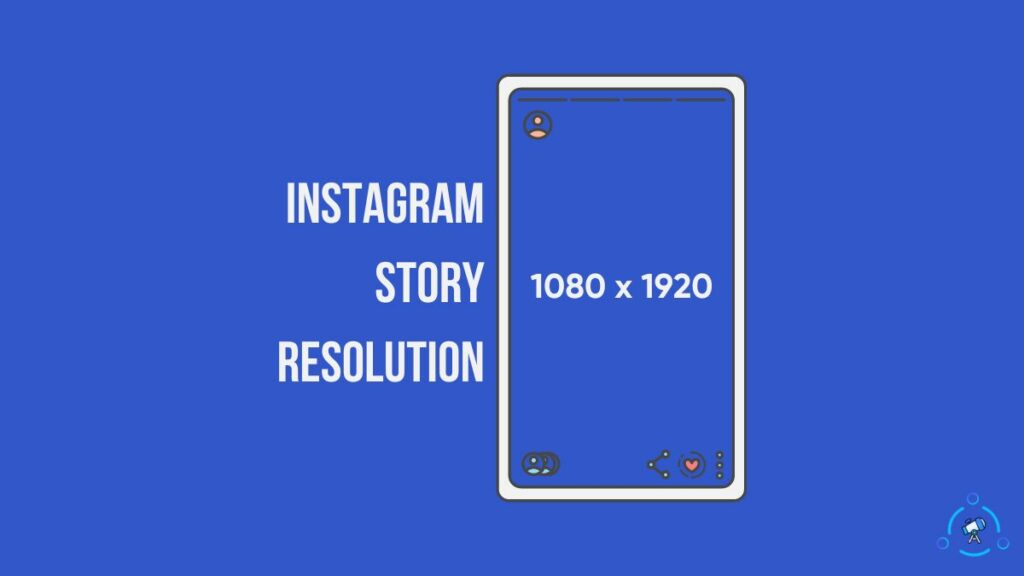
Incorrect aspect ratios and oversized images or videos are the reason why your Instagram stories look blurry after posting them. For your Instagram story to look good, it should be in the 1080 x 1920 px resolution, and the file size must be below 1MB.
Incorrect Resolution
Instagram story resolution is 1080px by 1920px. If the image or video you try to upload is lower than the abovementioned resolution, then Instagram will stretch the content to fill the screen. As you know, stretching images or videos makes them blurry or pixelated.
On the other, if the picture or video you uploaded is way bigger than 1080×1920, then Instagram will automatically resize it. During the process, the image or video will lose its quality.
Poor Internet Connection
Did you know that Instagram will lower the quality of the story if the Internet speed is too low when uploading?
Yes, you heard it right. If your internet connection speed is poor, it will affect the quality of the story you post.
It will take longer than usual or show try again error when you upload Instagram stories with poor internet speed. Due to this, Instagram will automatically chop the quality of the image or video to upload it faster.
The key here is to upload the image or video when you have a fully stable, faster internet connection. This way, the image/video gets uploaded fast, and Instagram won’t lower the quality.
Instagram Compression
If Instagram were to store the image and video without compressing, it would take at least 100x resources to store it in their servers.
Furthermore, users who view the content on their devices will have to wait longer, and some people with a poor internet connection might not even be able to view them.
So, it’s essential for Instagram to compress the image or video so that it can be displayed to all users without any issue relating to internet speed or storage.
But if you do some little things like maintaining the proper resolution when uploading, it will help you to save some quality loss that Instagram would make. More on this is below.
How To Fix Blurry Instagram Stories
To fix blurry Instagram stories, you must ensure that the video or photo is in 1080 x 1920 px resolution and that you upload it while connected to a high-speed and stable Internet connection. Also, make sure to toggle off the Data Saver option in Instagram Settings.
Check The Aspect Ratio And Resolution
The official Instagram story resolution is 1080px x 1920px.
If the size of the story is smaller or more, then Instagram will automatically adjust it to make it 1080 x 1920. And the way Instagram does this is not in an optimized manner.
If you manage to size the image or video before uploading correctly, you can escape the Instagram resizing process. This will help you to improve the quality of your Instagram story significantly.
So here is what you need to do.
Before uploading the image or video, use a video editing app or photo editing app to make the resolution 1080 x 1920.
If you don’t want to use any application for this, your smartphone will probably have an editing tool to let you resize the image or video.
Below are some best settings to keep in mind while preparing content for an Instagram story:
- An aspect ratio of 4:5 or 8:10
- 1080px x 1920px resolution
- 720 PPI
Now export the image or video in the best settings and format for the web.
Once you have the final file, upload it to Instagram, and it won’t resize it this time as the file is already in 1080 by 1920 pixels resolution.
If you view Instagram stories on an iPad and the app is too small, you may use Insta PWA to make Instagram full screen on an iPad.
Turn Off ‘Data Saver’ Option In Instagram Settings
Instagram has a setting that will help you to save data usage by restricting high-quality uploads.
If this option is enabled, Instagram will highly compress the image or video before uploading so as to save data. But this option does more harm than good.
We all want our Instagram stories to look great. If yes, you should turn off the Data Saver option.
Disabling this option will stop the compression to a great extent which will help us to post high-quality Instagram stories.
Let’s see how to turn off Data Saver mode on Instagram:
- Open the Instagram app and go to your profile
- Tap on the three dots icon from the top right corner
- Go to Account > Cellular data use
- Toggle off the Data Saver option
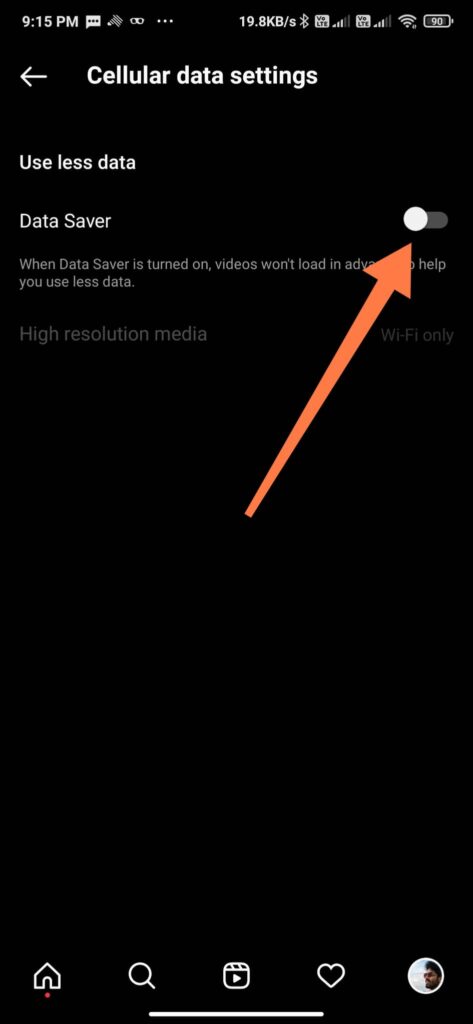
This option let alone will help you upload high-quality Instagram stories.
Use Stable And Fast Internet When Uploading
A stable and faster internet connection is necessary if you want your Instagram story to look sharp and crisp.
If you try to upload an Instagram story with a poor Internet connection, a considerable compression process will take place, significantly lowering the quality.
You must always ensure you have a good quality internet connection that is faster and more stable.
It doesn’t matter if it is in mobile data or WiFi. The thing is that the Internet speed should be good.
You can visit websites like fast.com or speedtest.net to check your Internet connection quality and speed.
An internet speed of more than 15Mbps is good and will help you post high-quality Instagram stories.
If you are on the go and don’t have access to high-speed internet, it will be better to post the story when you have access to stable and faster internet.
Use Right Settings While Capturing The Content
These days, smartphones come with excellent cameras and hardware capable of taking high-quality images and videos.
But you must use them properly to capture high-quality content.
Every device will have some sweet settings that will help you to capture images and videos with the best quality and detail.
The setting will differ from device to device.
Before capturing images or videos, check:
- Image resolution
- Video quality
- Codec
- Format
- FPS
For best quality, set the resolution to at least 1080 x 1920.
You should always shoot the content in the maximum high setting possible. You can resize it later while preserving the quality at the same time. If you capture more details at the source, the same can also be maintained during the editing.
Properly Share The Image/Video Between Devices
You should take utmost care while transferring images and videos from one device to another.
This is one of the biggest mistakes made by people that result in terrible Instagram story quality.
Apps like WhatsApp and Facebook Messenger compress the images and videos heavily before sending them. These apps do lossy compression that will ruin the detailing of the image or video.
Services like these will ruin the quality of content.
You should never use apps like WhatsApp to share content.
The best way to share images and videos on the Internet without losing quality would be to use Google Drive, iCloud, Google Photos, etc.
You may even use Nearby Share or Airdrop to transfer files locally without losing quality.
Reset Internet Settings On Your Device
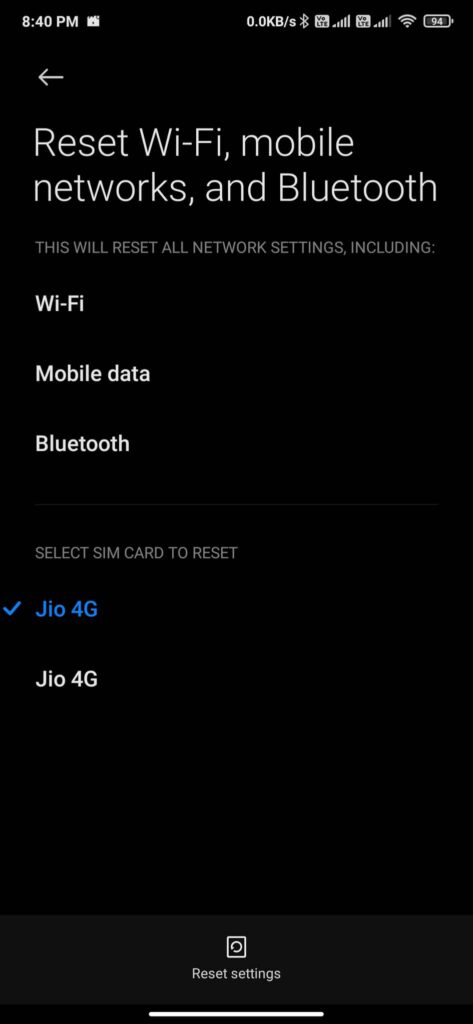
Network quality can cause blurry Instagram stories. Your Internet speed will get affected if the network settings are not correctly configured, affecting the quality of the Instagram story you upload.
The simple solution here is to reset the network connectivity settings to eliminate any misconfiguration that might be affecting the overall internet quality on your device.
On Android:
- Go to Settings
- Find the Network settings. You can search for it on the search bar.
- You need to find an option that says ‘Reset network settings‘
- The name of the option will differ from device to device. But all Android smartphones will have some settings to reset the network configurations.
On iPhone:
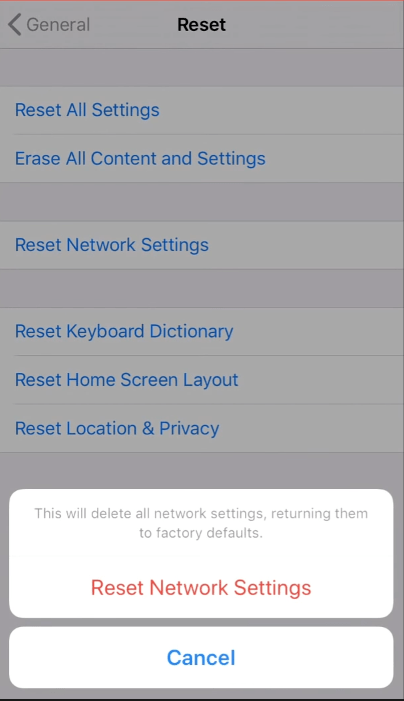
- On your iPhone, go to Settings
- Open General > Reset
- Find Reset Network Settings and proceed with the process.
- Once done, wait for a couple of seconds for your iPhone to find the network signal, connect and stabilize.
Misconfigured internet settings will cause quality issues even while sharing Reels to your Instagram Story.
Update Instagram App
Outdated or older versions of the Instagram app are prone to bugs, and you might miss out on some new features. You are always advised to update your Instagram app to the latest version whenever available.
Most phones will have automatic app update enabled by default, but for some reason, if that doesn’t happen, you should manually check and see if an update is pending for Instagram on your smartphone.
The outdated Instagram app will cause issues like the app crashing continuously or a Try Again error.
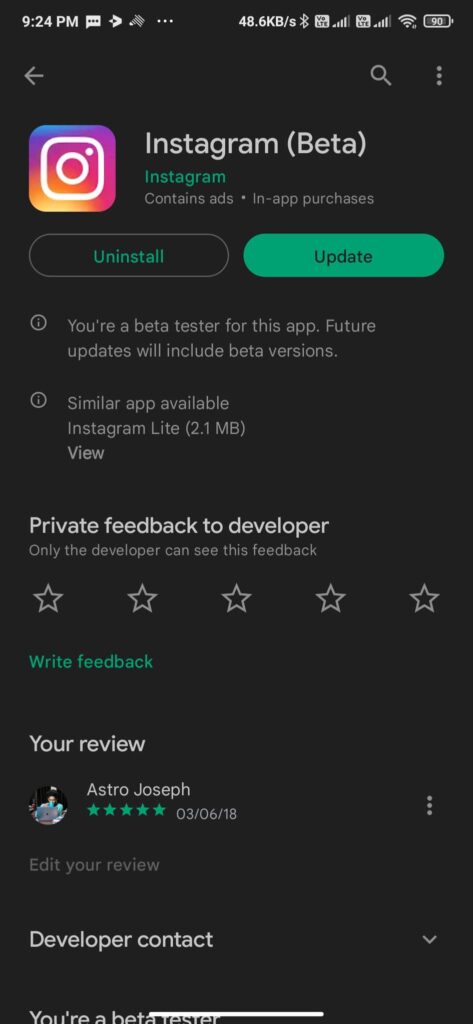
On Android:
- Open Google Play Store
- Search for Instagram in the search box
- See if you can see an ‘Update‘ button next to the app name
- If an update is available, click on the Update button to install the same.
- Now open the Instagram app to see if the issue is solved.
On iPhone:
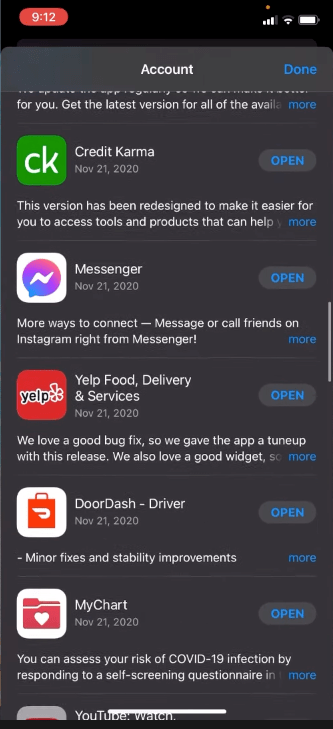
- Open the App Store app
- Tap your profile icon from the top right corner of the screen.
- Go through the list of apps available under the Available Updates section.
- Tap on the Update button next to the Instagram app and wait for it to complete
Switch The Internet Source
No matter what you do, if there is some issue with your Internet connection, then Instagram might fail to work as expected.
Latency issues, speed fluctuations, etc., are a few common types of errors that you may find in your Internet connection.
If this is the case, we can try connecting to a different Internet network to see if that fixes the issue.
You might have multiple internet sources available. For example, if you are using mobile data to access Instagram, try connecting to WiFi and see if it makes any difference.
Similarly, try switching to mobile data if you are using Instagram on your device while connected to a WiFi network.
This way, we can eliminate standard network connectivity-related issues and get Instagram working as expected.
Try Instagram’s Inbuilt Camera
Apart from the inbuilt camera app, there are various other third-party camera apps for your device. If you have been using a third-party or inbuilt camera app for clicking pictures, using the Instagram camera might help you to prevent quality loss.
Pictures taken by Instagram’s camera will be better optimized for the platform. It will correctly optimize the photo or video for the correct resolution, quality, and aspect ratio.
So next time when you are about to post a story on Instagram, try capturing the same using the Instagram camera and post them. Many people have noticed significant differences between the photos or videos taken by the camera app on your phone and the Instagram camera.
Reinstall Instagram On Your Smartphone
Reinstalling the Instagram app on your Android or iOS devices is another way to get rid of blurry Instagram stories. You can follow the steps below to uninstall and reinstall the Instagram app on your device.
On Android:
- Go to Settings
- Manage Apps
- Find Instagram from the list of installed apps
- Tap the Uninstall button
- Open Google Play Store
- Search for Instagram and tap the Install button
- Once installed, log in with your Instagram account.
On iOS:
- Find the Instagram app shortcut icon
- Tap and hold it for a few seconds, and tap on the Remove App option
- Tap Delete App
- Open the App Store app on your iPhone
- Use the search box to search for Instagram
- Tap the Install button.
Once reinstalled, you will have to log into your Account again as the account-related data is wiped upon uninstalling Instagram.
What’s Next
Uploading properly sized images will help you to fix blurry Instagram stories to a great extent. Using Instagram’s camera, updating the Instagram app, disabling the data saver option, and using a stable Internet connection are a few things to do if you notice blurry Instagram stories after uploading them.
If you feel like your smartphone camera quality is not up to the mark, you may use a high-quality professional camera to capture content and then transfer it to your device to post them on Instagram.
Liking someone’s Instagram posts may be embarrassing to you, here’s what happens after you accidentally like an Instagram post.


